Advanced SLAs
Beta feature
This is currently a beta feature.
Advanced SLAs allow you to centrally manage, track, and enforce Service Level Agreements (SLAs) across your routers. You can define specific time limits, establish success conditions, and trigger automated actions (such as reassignments, field updates, or notifications) based on whether an SLA is approaching, met, or violated.
Enabling Advanced SLAs
Irreversible
If you have existing SLA Actions configured on your routers, enabling this feature will automatically convert them to advanced SLA Policies. If you disable this feature later, all SLA configurations will be permanently deleted.
Before creating your first SLA policy, you must enable the feature.
Select Kubaru from the App Launcher menu.
Expand the Admin tab in the navigation menu and click Settings.
Under the Beta Features section, check the box for Advanced SLAs.
Review the confirmation modal and click Proceed to activate the feature.
Creating an SLA Policy
SLA Policies are managed centrally, meaning you can create a policy once and apply it to multiple routers.
Select Kubaru from the App Launcher menu.
Click SLA Policies in the navigation menu.
Click New to create a new policy.
Enter a Policy Name (e.g., “Platinum Support Plan”).
Select the target Object (e.g., Case).
Set the Time Limit (the amount of time allowed before the SLA is violated).
(Optional) Select one or more context schedules. This ensures the SLA timer only runs during the specific hours defined in those schedules.
(Optional) Define Filters to specify exactly which records this SLA applies to (e.g., only applying to “Urgent” priority cases).
Define your Success Conditions. This is the criteria that must be met for the SLA to be considered completed (e.g., Case Status equals Closed).
Add one or more triggers and actions.
Click Save.
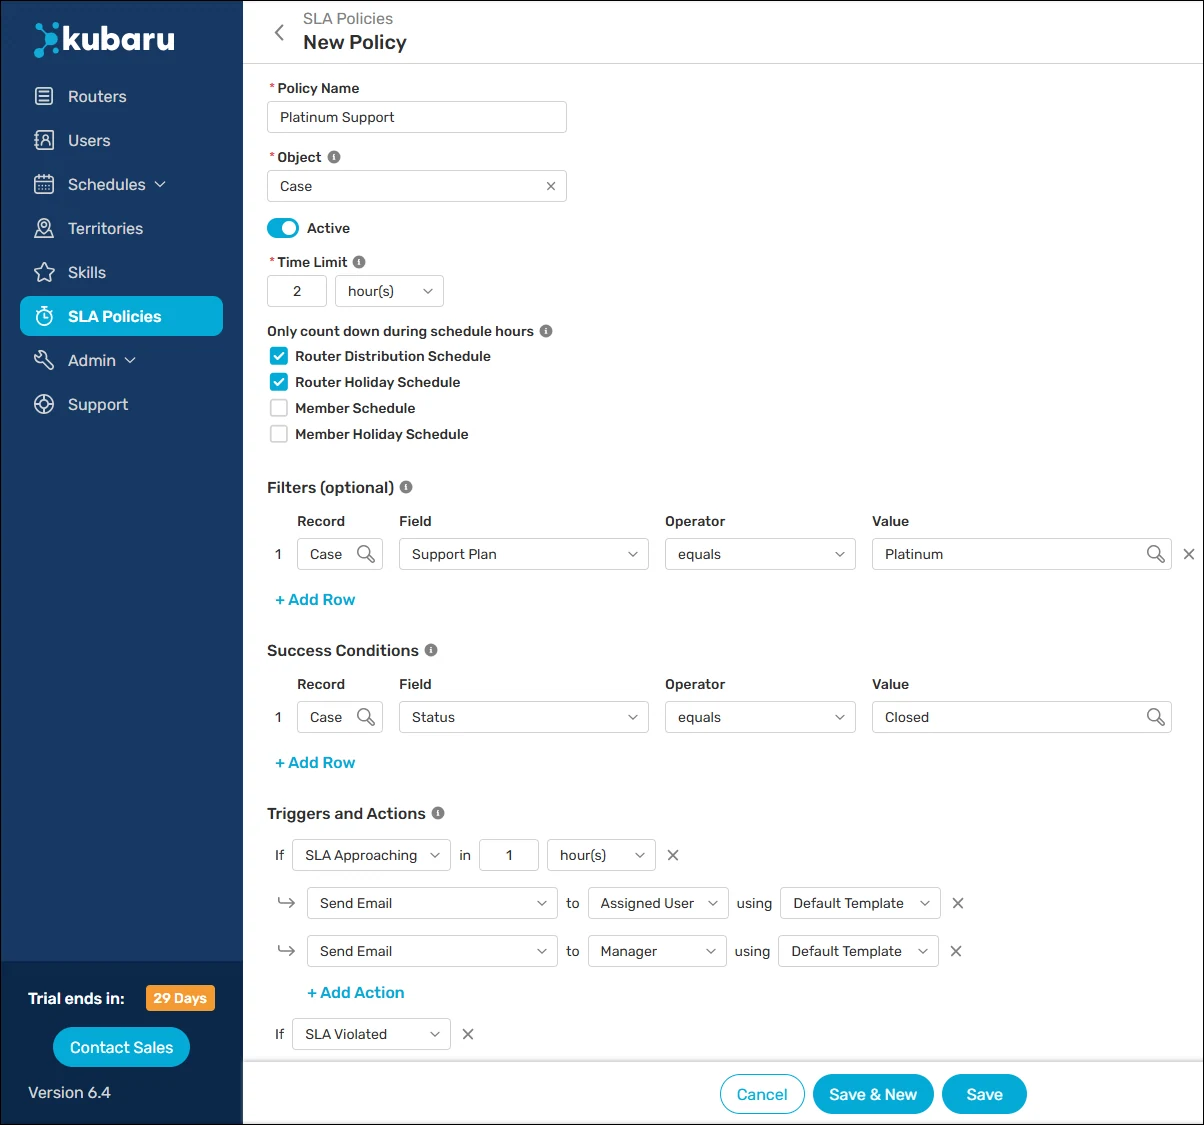
Triggers and Actions
When building your SLA policy, you can add Triggers and Actions to automate your workflow. These allow you to stay on track by prompting team members as deadlines approach or by enforcing consequences, such as reassignment or notifications, if an SLA is violated.
Triggers
You can configure one or more triggers that control when your automated actions should fire.
| TRIGGER TYPE | DESCRIPTION |
|---|---|
| SLA Active | Fires after the SLA has been running for a specific duration. |
| SLA Approaching | Fires when a specific amount of time remains before the time limit expires. |
| SLA Violated | Fires if the time limit expires without success conditions being met. |
| SLA Met | Fires if the success conditions are successfully met before the deadline. |
Actions
Actions are the specific tasks Kubaru performs automatically once a trigger is tripped.
| ACTION TYPE | DESCRIPTION |
|---|---|
| Notifications | Send automated alerts via Email, Slack, or Microsoft Teams. |
| Reassign | Automatically route the record to the Connected Queue (the original source queue), a specific queue, or a specific user. Note: this action is only available for the SLA Violated trigger. |
| Update Field | Automatically update specific Salesforce fields (e.g., Status or Priority). |
| Set User As Unavailable | Toggle the assigned user to unavailable in Kubaru to prevent further assignments. |
| Create Task | Automatically create a Salesforce Task assigned to the current owner, their manager, or a specified user. |
Associating SLAs with Routers
SLA policies don’t apply to records automatically. A record will only receive an SLA if it is assigned by a router associated with that specific policy. Follow these steps to associate an SLA policy with a router:
Create a new router or edit an existing router.
Scroll to the Additional Settings section and expand SLAs.
Search for and select your Service Level Agreement.
(Optional) Click Add Row if you’d like to select additional SLAs policies.
Click Save.
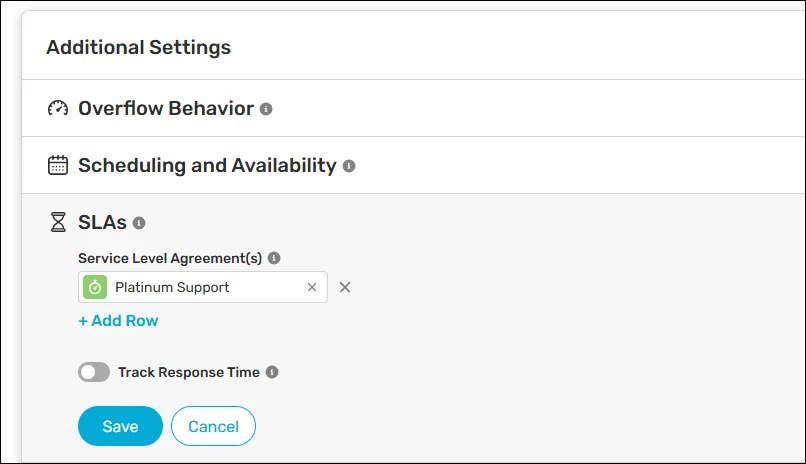
Monitoring Your SLAs
Kubaru provides multiple ways to track the status of your SLAs in real-time.
SLA Record Table
You can view a comprehensive table of SLAs associated with each SLA policy from the Records tab:
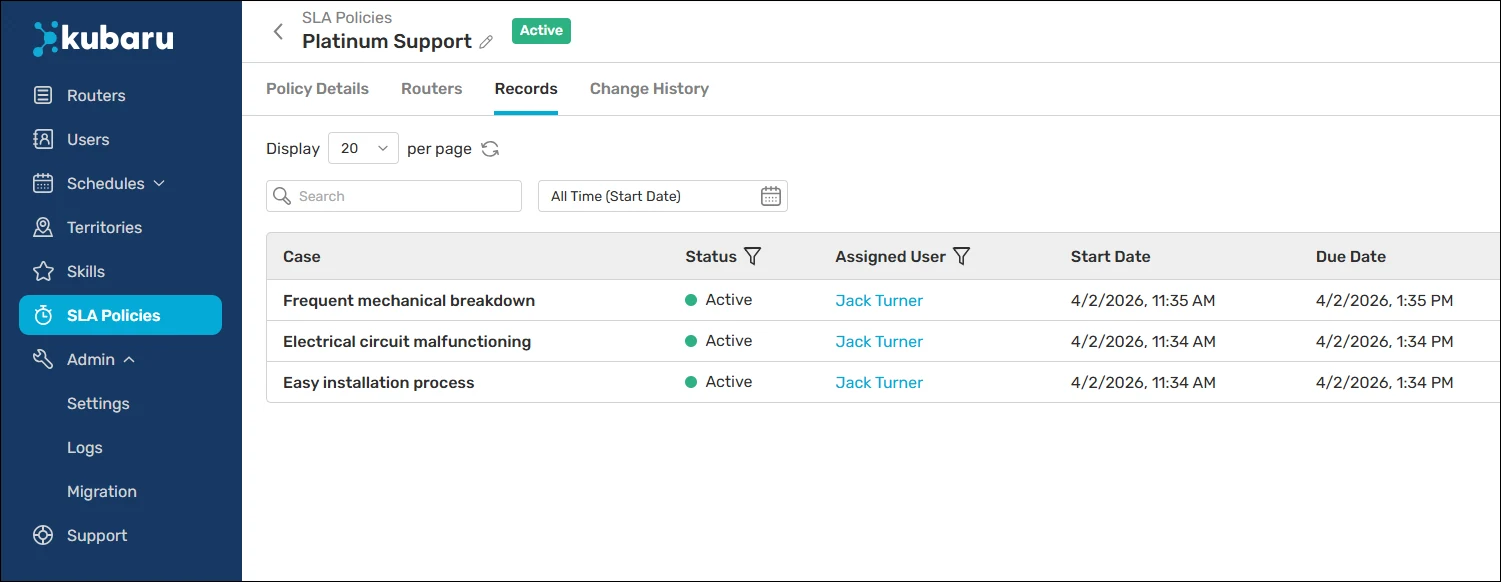
Clicking on an SLA record will open the record details:
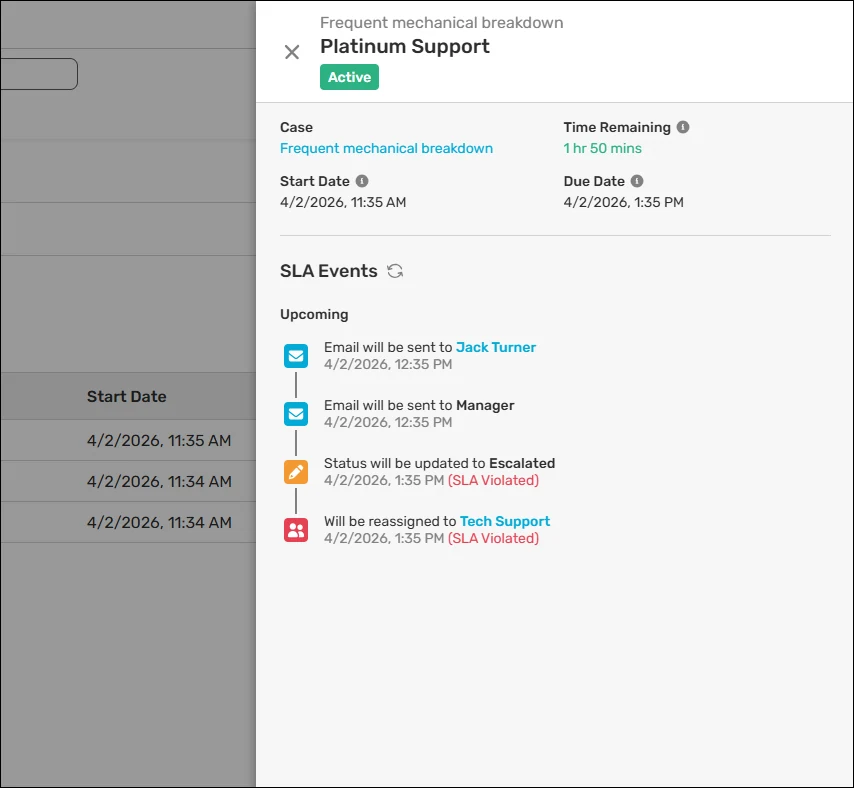
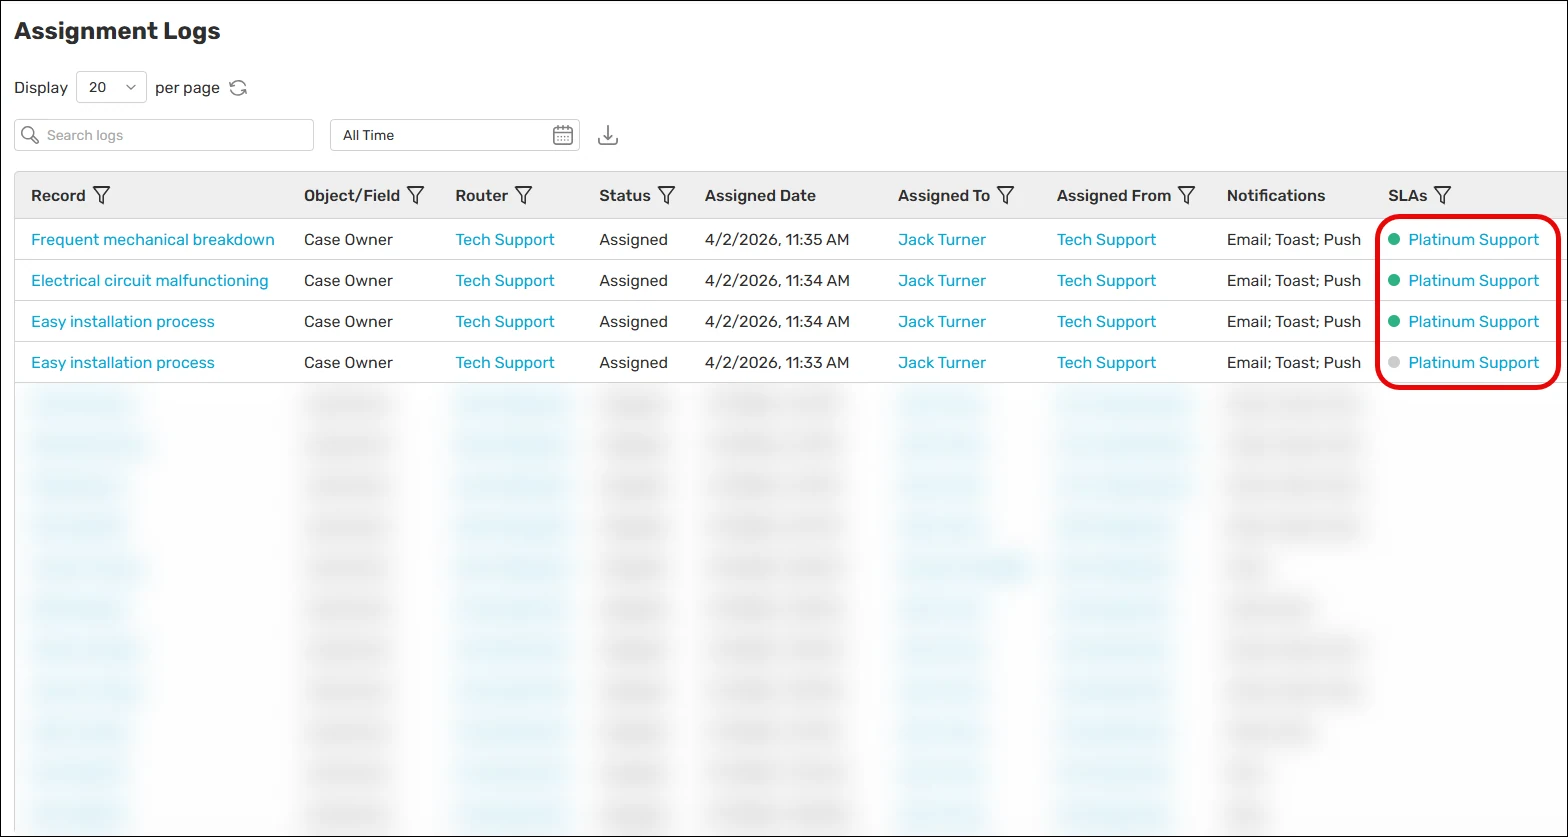
Assignment Logs
The assignment logs feature an SLAs column that displays all policies associated with a given record. You can click on an SLA to open the record details.
Kubaru SLA Panel
You can add the Kubaru SLA Panel to your Salesforce record detail pages. This will allow your end users to see any SLA policies that apply to their records:
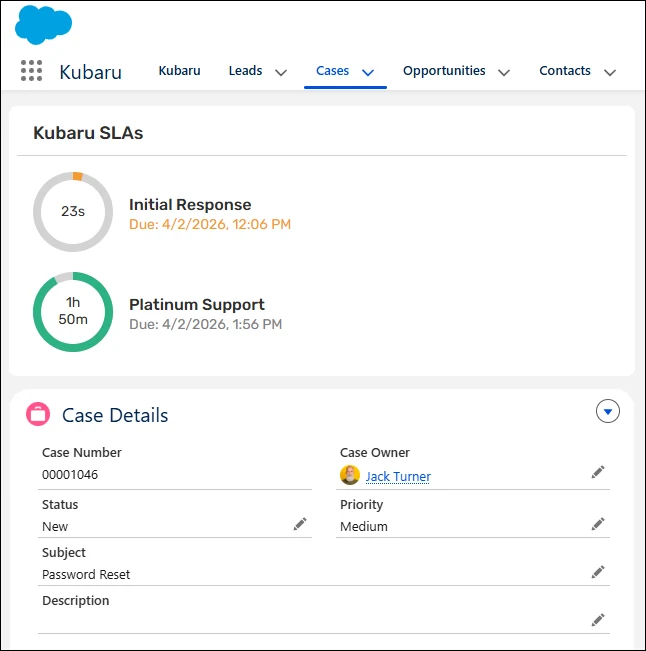
Users will also be able to click on SLA policies in the panel to view the SLA record details.