Router members receive assignments from routers. Members can be added manually or synced based on the criteria you select.
Adding Members Manually
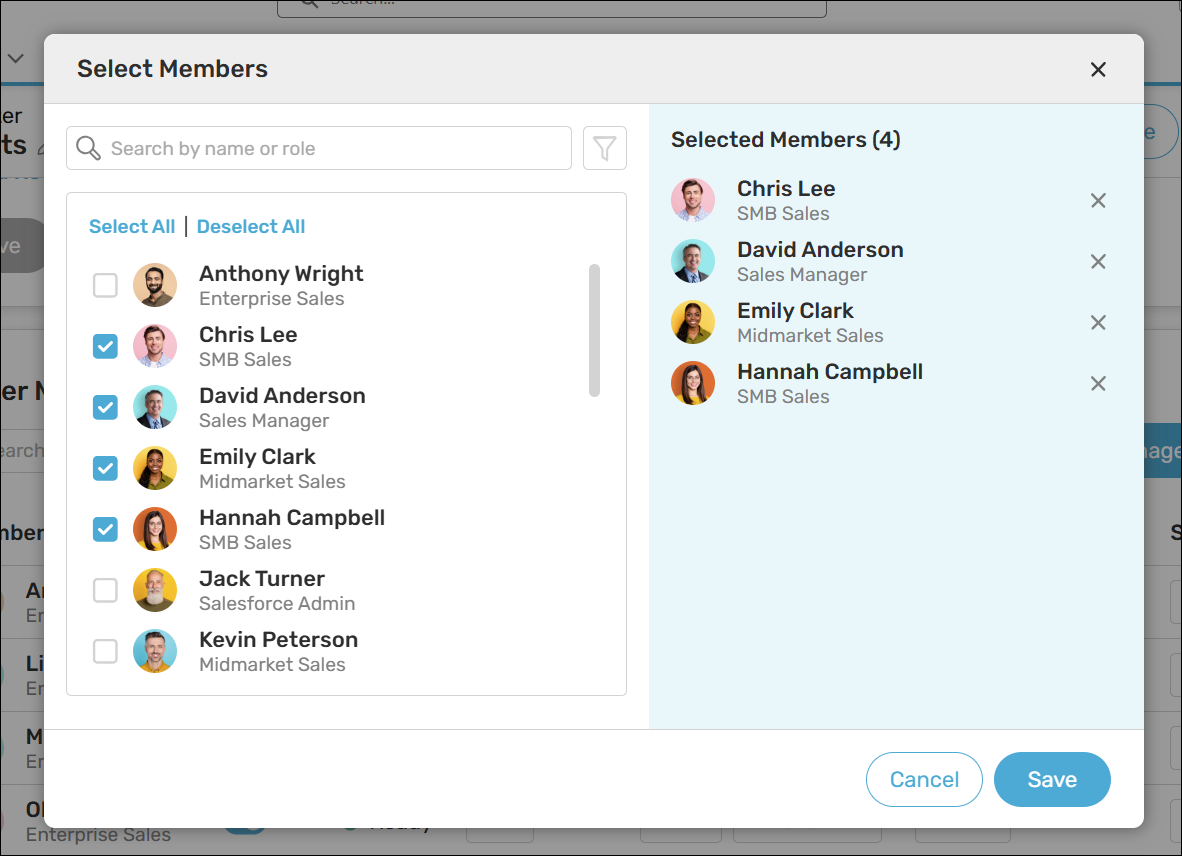
Follow these steps to manually add one or more members to a router:
- Create a new router or edit an existing one.
- Scroll to Router Members step and click Manage Members.
- Select one or more users to add.
- Click Save.

Enabling Member Sync
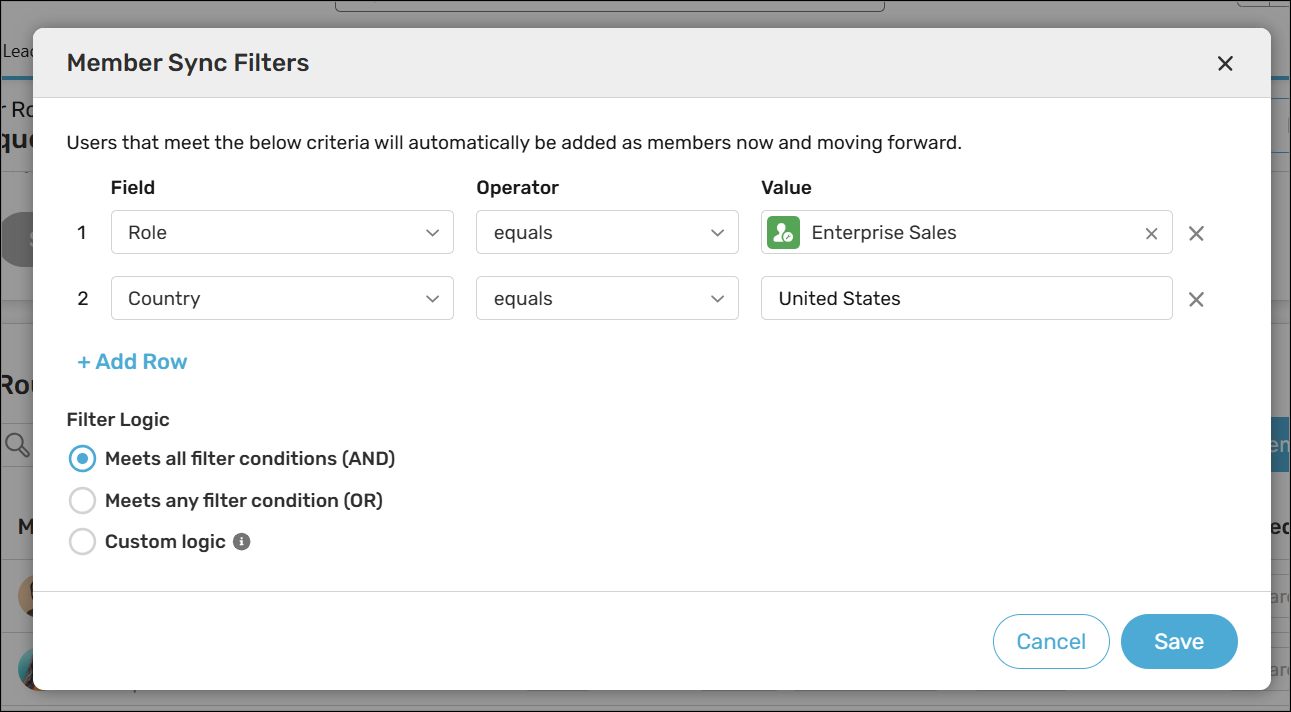
Member sync automatically adds users to routers based on the criteria you define. You can define criteria based on any standard or custom field(s) from the User object. Follow these steps to enable member sync for one or more routers:
- Create a router or edit an existing one.
- Scroll to the Router Members step and enable the Member Sync toggle.
- Select a User Field (e.g., Role).
- Select an Operator (e.g., “equals”).
- Enter a Value (e.g., “Enterprise Sales”).
- (Optional) Click Add Row to define additional filters.
- Click Save.

Member Sync Special Filters
The following special filters can be used when defining member sync criteria:
| FILTER | DESCRIPTION |
|---|---|
| Is Direct Member of Group | This filter syncs in users who are members of a public group or queue. This only includes users who are added directly to a group–it does not include users who are automatically added to a group based on their role or territory. |
| Has Kubaru Skill | This filter syncs in users that have a particular skill assigned. |
| Has Kubaru Territory Assigned | This filter syncs in users who have (or do not have) at least one territory assigned. This is most commonly used for Territory Assignment routers. |
| Is Member Of Kubaru Territory Group | This filter syncs in users from a selected Territory Group. This is most commonly used for Territory Assignment routers. |
| Has Kubaru Membership | This filter syncs in any users that are members of at least one router that assigns the same object. This is most commonly used for Duplicate Matching routers. |
| Is Found In Selected User Lookups | This filter is only available for User Lookup routers. It syncs users from the router’s selected user lookup fields as members. |
Member Settings
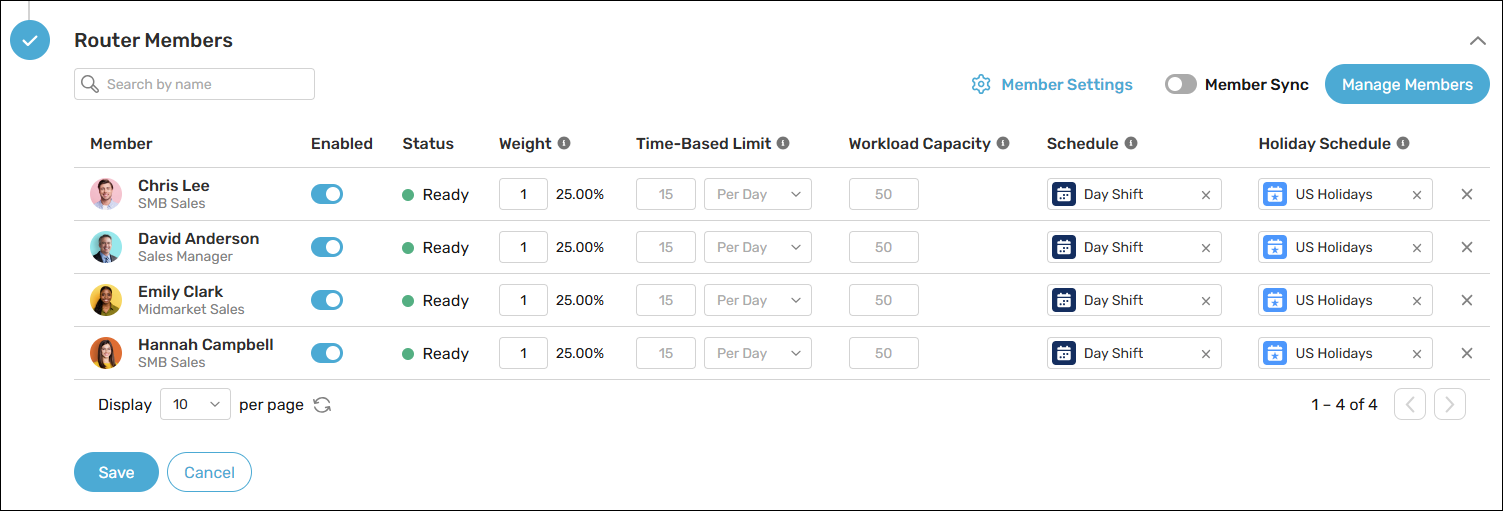
You can adjust the following settings for each router member:
| FIELD | DESCRIPTION |
|---|---|
| Enabled | Users will only receive assignments while this toggle is enabled. |
| Weight | Adjust weights to control the percentage of assignments each member receives. See Weights for more information. |
| Time-Based Limit | Defines the maximum number of records members can receive per hour, day, or week. See Time-Based Limits for more information. |
| Workload Capacity | Defines the maximum number of active records members can own at any given time. Members who have reached this limit will not receive additional assignments until they’ve reduced their active workload. See Workload Capacity for more information. |
| Schedule | Defines the days and hours during which the router member will receive assignments. Leave blank if you don’t want to suspend assignments during non-working hours. See Distribution Schedules for more information. |
| Holiday Schedule | Defines the observed holidays during which the router member will not receive assignments. Leave blank if you don’t want to suspend assignments during holidays. See Holiday Schedules for more information. |

Default Member Settings
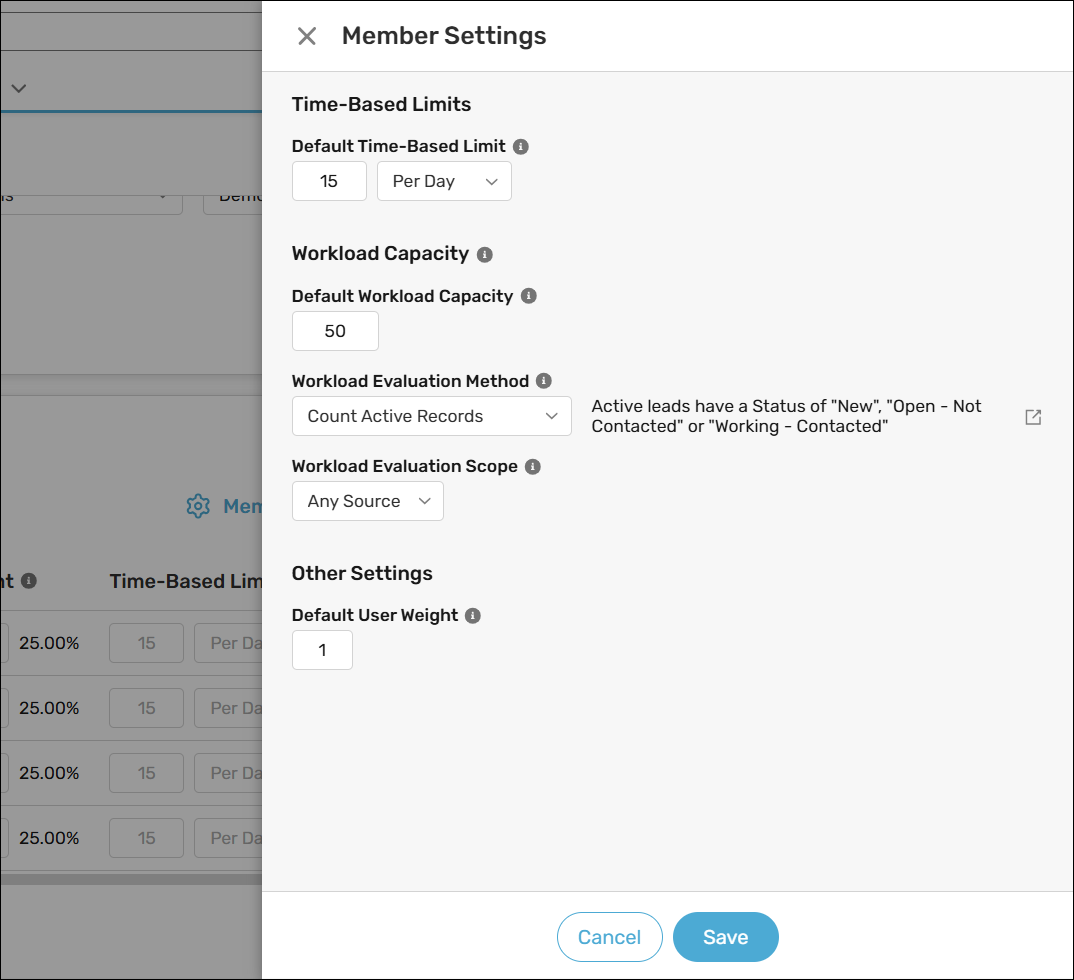
You can click the Member Settings link above the router members table to configure the following default settings:
| FIELD | DESCRIPTION |
|---|---|
| Default Time-Based Limit | Define a default Time-Based Limit for all router members. You can overwrite this for individual members if needed. |
| Default Workload Capacity | Define a default Workload Capacity for all router members. You can overwrite this for individual members if needed. |
| Workload Evaluation Method | Defines how user workload is calculated for Load Balance routers and Workload Capacity. See Workload Evaluation Method for more information. |
| Workload Evaluation Scope | Defines which records should be considered when calculating workload. See Workload Evaluation Scope for more information. |
| Default User Weight | Allows you to specify a default weight for new router members. |

Things to keep in mind
