Trigger-Based Assignments

On This Page

Kubaru assigns most records within one minute. However, you may have a use case that calls for immediate assignment. Trigger-based Assignment is available for such circumstances.

Trigger-based assignment only works under the following conditions:

  • It must be enabled for the object being assigned.
  • If records are imported (or updated) in batches, the batch size must be no greater than your specified Max Trigger Batch Size for that object.
  • The user who imported or updated the record must have a Kubaru package license and one of the Kubaru permission sets assigned.
    • The user must have access to update the assignee field specified in the router.
    • If you have field updates configured, the user must have edit access to each of those fields.
  • There can’t be any active Duplicate Matching routers enabled for the object. This is because we cannot guarantee that the timing of events within an insert/update transaction will allow for duplicate matching logic to work as expected in every case.

Enable Trigger-Based Assignment

Follow these steps to enable trigger-based assignment for one or more objects:
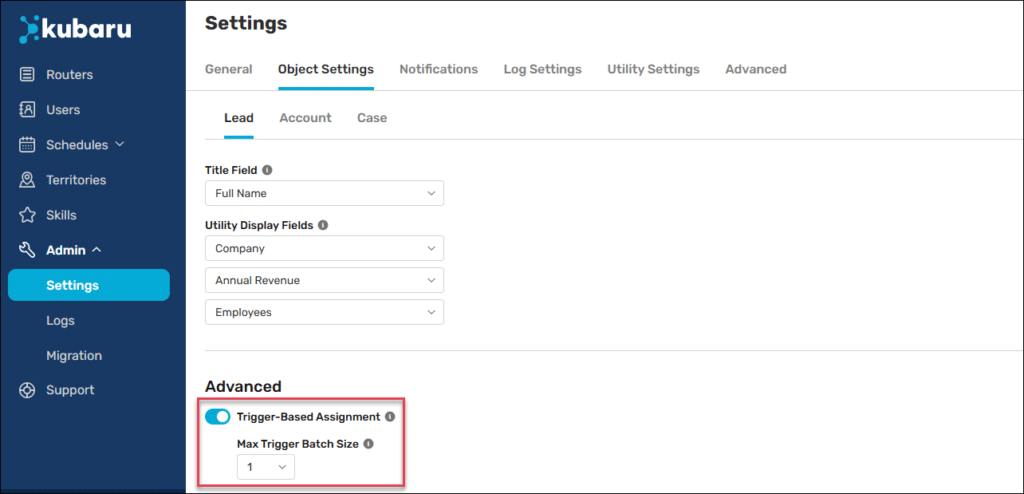
  1. Navigate to the Kubaru Console and click on the Settings tab.
  2. In the Object Settings section, select your object and click Edit.
  3. Check Trigger-Based Assignment and click OK on the prompt that appears.
  4. Update the Max Trigger Batch Size as desired. Batches of records with a greater size than this will not be subject to trigger-based assignment.
    1. This setting has system performance implications. The greater the max trigger batch size, the closer each transaction will get to governor limits, e.g. CPU time. We recommend consulting with your resident Salesforce technical expert before making changes to this field.
  5. Click Save.

Deploy Trigger for Any Object

Available in Version 4.3 and up, for Enterprise and Unlimited Salesforce editions only

Trigger-based assignment is available out of the box for the Lead, Case, Opportunity, Contact, Account, Asset, Task, and Event objects. However, it can be set up for any object that supports Apex triggers, which most do. Note that this will deploy an automatically generated Apex trigger and Apex test class into your org. These components are unmanaged, meaning they are not technically part of the Kubaru package, but behave as code that was developed within your own org.

  1. First, create a router for the object of interest (if you haven’t already).
  2. Navigate to the Settings tab of the Kubaru Console.
  3. In the Object Settings section of the page, select the object of interest in the Object field.
  4. In the Trigger-Based Assignment field, click the Deploy Trigger link. A modal window will pop up.
  5. If this is your first time going through this process you will see an error message stating that a remote site is not configured. Click the Configure Remote Site button. Doing so creates the proper connection so that our application can deploy the needed apex components.
  6. You will see a preview of the new apex components. If you would like to deploy the code but do not yet want to enable trigger-based assignment for this object, uncheck Enable Trigger-Based Assignment on Deploy. Click Deploy.
  7. After a few moments you will see a success message in the modal window. Click Finish.
  8. You may now toggle trigger-based assignment on or off for that object after clicking the Edit [Object Name] button.
image
image

Note: should you ever need to remove the apex components, you can click on the Manage Trigger link, then click the Remove button.

image
Was this article helpful?

On This Page