Duplicate matching routers assign new duplicate records to the same owner as the existing record. These routers leverage standard Salesforce Duplicate Rules to identify duplicates.
Creating Salesforce Duplicate Rules
You’ll need to have at least one active Salesforce Duplicate Rule before you can create a duplicate matching router. See Customize Duplicate Rules for step-by-step instructions on how to create Salesforce Duplicate Rules.
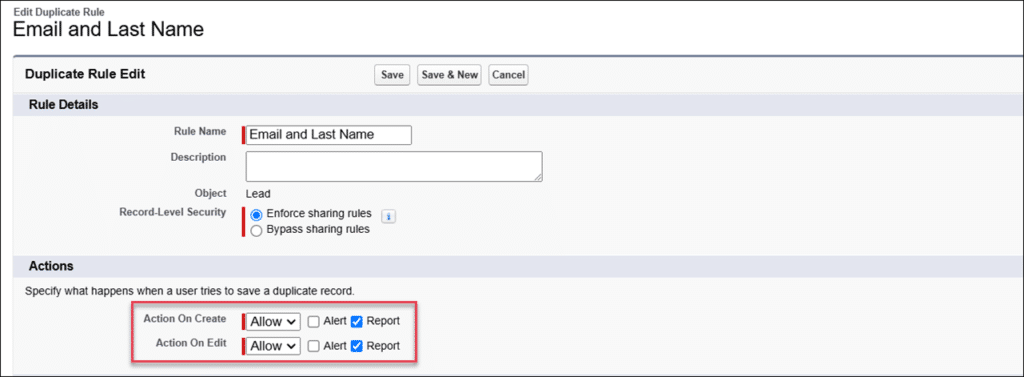
IMPORTANT: when creating a Salesforce Duplicate Rule, the Report checkbox for Actions On Create and/or Actions On Edit must be checked for duplicate matching routers to work correctly.
Create a Duplicate Matching Router
Follow these steps to create a duplicate matching router:
- Navigate to the Kubaru application.
- Click the New Router button.
- Enter a name for your router (e.g., “Duplicate Leads”).
- Select the Object you want to assign (e.g., Lead).
- Select the Field to Assign (e.g., Owner).
- (Optional) Update the Evaluation Order. See Prioritizing Your Router for more information.
- Click Create Router.
- Select “Duplicate Matching” as the Assignment Method.
- Select at least one Duplicate Rule.
- Configure the Cross-Object Mappings if needed. See the Cross-Object Mappings section for more details.
- Select the Tie Breaker to indicate what should be done if multiple duplicate records are found.
| OPTION | DESCRIPTION |
|---|---|
| Match oldest record | The record with the oldest Created Date is chosen. |
| Match newest record | The record with the most recent Created Date is chosen. |
| Match last modified | The record with the most recent Last Modified Date is chosen. |
| Match last activity | The record with the most recent Last Activity Date is chosen. Note: this option is only available for objects that support this field. The result cannot be guaranteed if a duplicate is matched with a different object that does not support this field. |
- Connect a Queue. See the Connected Queues article for more information about creating and connecting queues.
- (Optional) Add Filters. See the Adding Filters article for more information.
- Add Members. See Adding Members for more information.
- (Optional) Adjust the Additional Settings below.
| SETTINGS | DESCRIPTION |
|---|---|
| Scheduling and Availability | The following settings can be configured to limit when assignments are made: Distribution Schedule: Select a distribution schedule to pause the router during non-working hours. See Distribution Schedules for more information. Assign During Off-Hours: Enable this if you want to use the distribution schedule as an SLA constraint without restricting when the router makes assignments. Holiday Schedule: Select a holiday schedule if you want to pause the router on holidays. See Holiday Schedules for more information. Assign During Holidays: Enable this if you want to use the holiday schedule as an SLA constraint while still assigning records on holidays. Assign Outside Member Schedules: Enable this if you want to use the member’s schedule as an SLA constraint without restricting when the member receives assignments. Assign During Member Holidays: Enable this if you want to use the member’s holiday schedule as an SLA constraint while still assigning records on holidays. Assign When Unavailable: Enable this if you want to assign records to router members even if their status is “Unavailable”. See Toggling User Availability for more information. Assign When Out Of Office: Enable this if you want to assign records to router members even if they are out of the office. See Out Of Office Schedules for more information. Must Be Logged Into Salesforce: Enable this to pause router members who are signed out of Salesforce or idle. See Must Be Logged Into Salesforce for more information. Pause During Phone Calls: Enable this to pause assignments to router members while they’re on a call. See Pause During Phone Calls for more information. Pause During Calendar Events: Enable this to pause assignments to router members whose Salesforce calendar indicates they’re unavailable. See Pause During Calendar Events for more information. |
| SLA Actions | The following SLA Actions can be enabled: Send Email Notification: Enable this to notify one or more users if records go unworked for a specified duration. See Unworked Record Notifications for more information. Reassign Record: Enable this to reassign unworked records after a specified duration. See Reassignment for more information. Track Response Time: Enable this to measure how long it takes router members to respond to assignments. See Tracking Response Time for more information. |
| Notifications | Configure the types of notifications that are sent when assignments are made. See Assignment Notifications for more information. |
| Field Updates | Configure one or more fields to be updated when a record is assigned. See Field Updates for more information. |
- Click the Activate button to activate your router. See Assignment Preview to learn how to check which records will be assigned before activating your router.
Cross-Object Duplicate Mappings
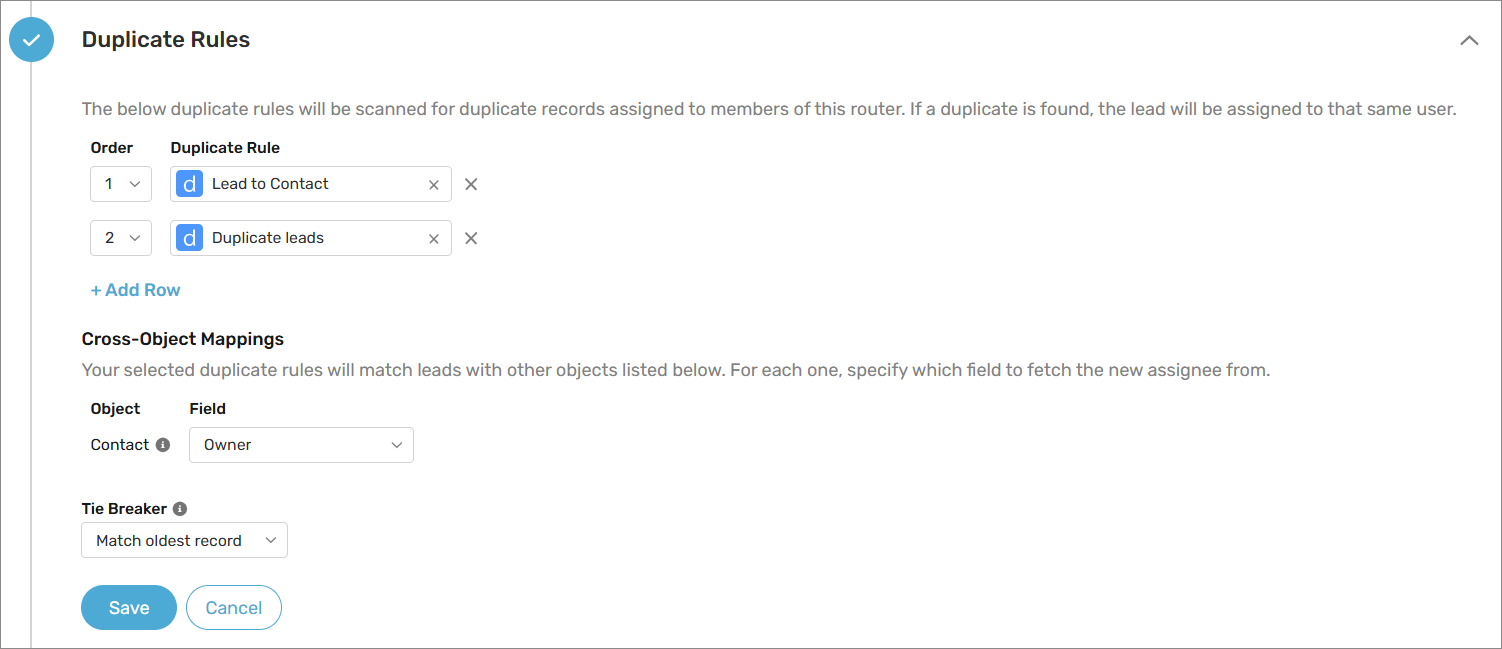
Some duplicate rules may match records from one object to another object (e.g., Lead to Account matching). In such cases, you’ll need to create a Cross-Object Mapping. This allows you to specify which user lookup field to reference on the object you’re matching against.
The Cross-Object Mappings section will become visible after you’ve added at least one cross-object duplicate rule to your router. In the example below, we’ve created a router that includes a duplicate rule titled “Lead to Contact” that compares leads to contacts based on the email address. In the Cross-Object Mappings section we’ve selected Owner as the Contact field to reference when assigning duplicates. As a result, this router will assign duplicate leads to whoever is listed as the Contact Owner.
Things to keep in mind