Shark Tank Preview lets your users view the details of a record before deciding to claim it. You can also lock records while they’re being previewed so that other users can’t claim them in the meantime.
Enabling Shark Tank Preview
- Expand the Admin tab in the navigation menu and click Settings.
- Click the Object Settings tab and select the object you’d like to configure.
- Toggle on Enable Shark Tank Preview.
- (Optional) Check Lock while previewing and enter a time limit. See the Lock While Previewing section below for more information.
- Click Edit to configure the preview layout. See the Configuring Preview Layout section below for more information.
- Click Save.
Once enabled, the Claim button in the Shark Tank tab of the utility is replaced with a Preview button that will open a preview panel. Objects where Shark Tank Preview isn’t enabled will continue to show the Claim button.
Lock While Previewing
If you’d like to prevent multiple users from previewing the same record at the same time, you can enable the lock setting.
- Expand the Admin tab in the navigation menu and click Settings.
- Click the Object Settings tab and select the object you’d like to configure.
- Check Lock while previewing and enter the number of minutes the lock should last.
- Click Save.
When a user clicks Preview, the record will be locked for the duration you specified. Other users can still see the record in the Shark Tank, but it will show a lock icon and a countdown timer — and they won’t be able to preview it until the lock expires. When the lock expires, the previewing user will see a popup notification and will be automatically exited from the preview panel. If the user clicks Cancel or Hide before the lock expires, the record will unlocked immediately.
If Lock while previewing is disabled, multiple users will be able to preview the same record at the same time. When any user claims the record, everyone else who’s currently previewing it will be notified and automatically exited from the preview panel.
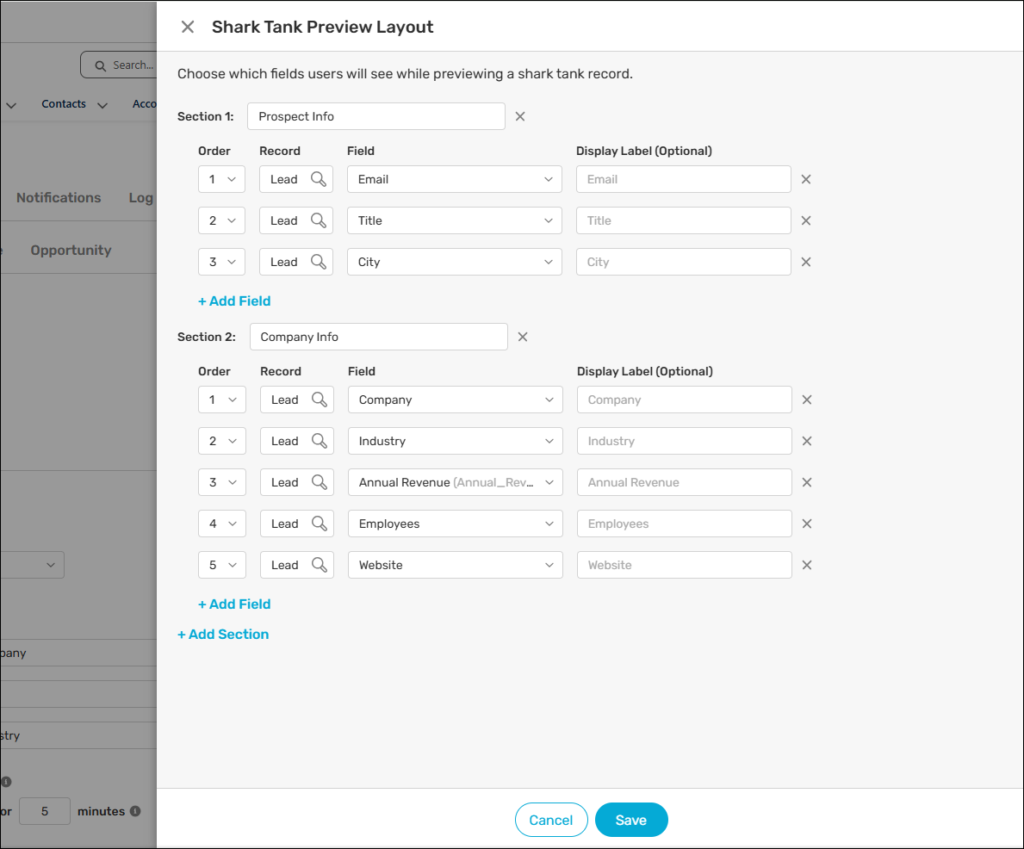
Configuring Preview Layout
You can customize which fields appear in the preview panel so your users see exactly the information they need.
- Expand the Admin tab in the navigation menu and click Settings.
- Click the Object Settings tab and select the object you’d like to configure.
- Scroll to the Preview Layout section and click Edit.
- Add and organize fields and sections as needed.
- Click Save.