The Kubaru Utility is only compatible with Lightning Experience.
The Kubaru Utility provides your users with quick access to the following features from anywhere in Salesforce:
- View recent assignments.
- Claim records from one or more shark tanks.
- Update status to available or unavailable (if permitted).
- Manage out of office schedules (if permitted).
- Manage notification settings.
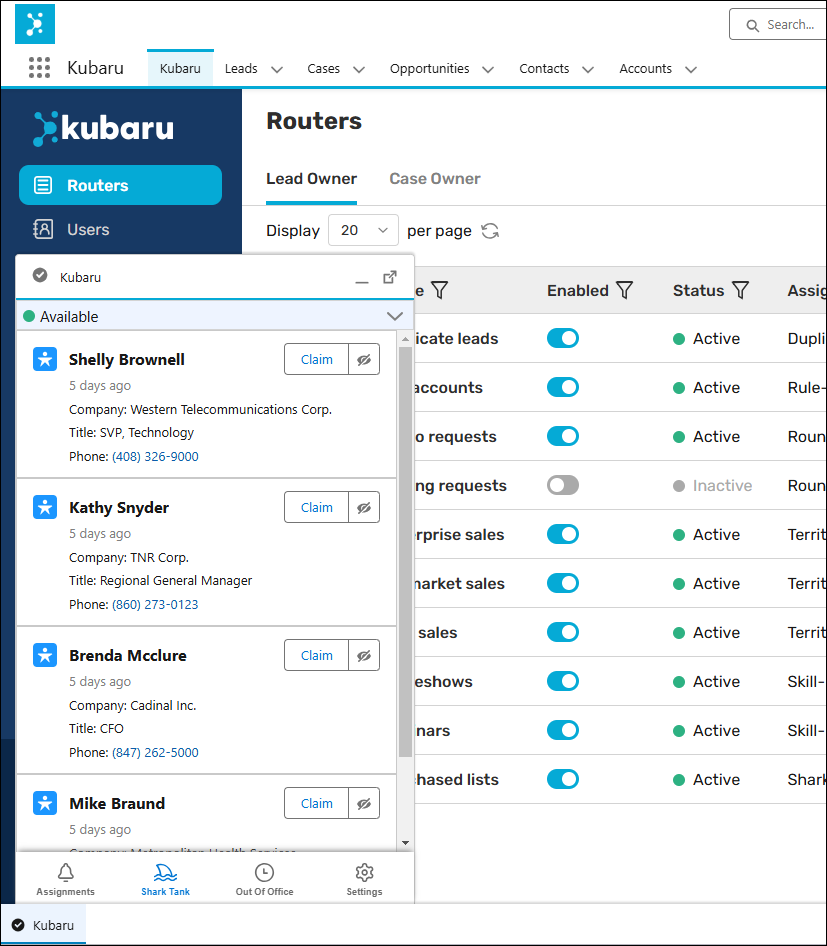
The Kubaru Utility will display in the toolbar at the bottom of Lightning Experience. Users will be able to access the utility from any page so long as it’s been deployed to the Salesforce App they’re using.
Deploying the Kubaru Utility
You must be a System Administrator in Salesforce to deploy the Kubaru Utility. If you’re using the Professional Edition of Salesforce, you’ll need to manually deploy the utility.
Follow these instructions to deploy the Kubaru Utility to one or more Salesforce apps:
- Select Kubaru from the App Launcher menu.
- Expand to the Admin tab in the navigation menu.
- Click Settings.
- Click Utility Settings.
- Scroll down to the Utility Deployment section.
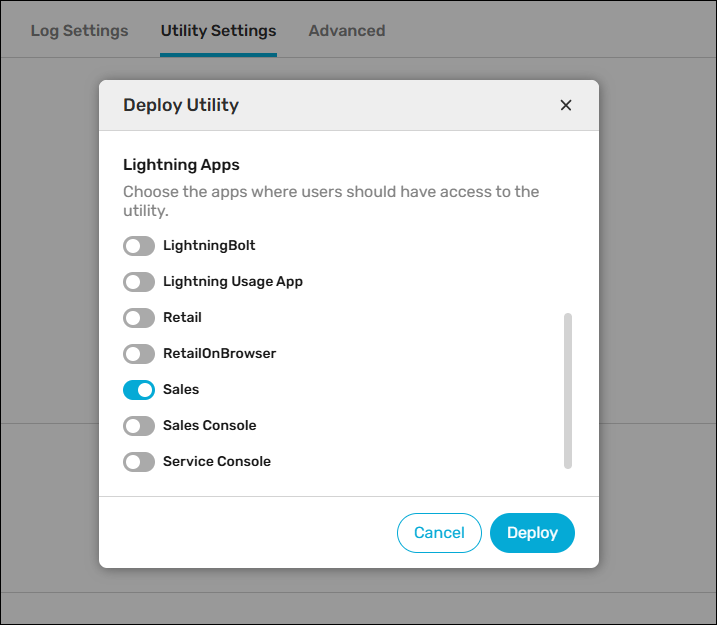
- Click the Deploy Utility button.
- Enable the toggle for one or more Lightning Apps (e.g., Sales).
- Click Deploy.
You should now be able to navigate to the selected app(s) and see the Kubaru Utility👍
Using The Kubaru Utility
Assignments Tab
The Assignments tab lets users view their recent assignments in order from newest to oldest. The following details will be displayed for each assignment:

| # | ITEM | DESCRIPTION |
|---|---|---|
| 1 | Title | The name associated with the record. Clicking on this field will open the record. You can change the Title Field in the Utility Settings. |
| 2 | Status | This displays the status of the assigned record (e.g., “New”, “Rejected”, etc.). If a record is deleted or reassigned, the status will display “Deleted” or “Reassigned” instead. You can change the Status Field in the Utility Settings. |
| 3 | Timer | This indicates how long ago the record was assigned. |
| 4 | Display Fields | You can select up to three fields to display in the Utility Settings. |
| 5 | Reassignment Countdown | This displays how much time remains until a record is reassigned. This will only display if Show Reassignment Countdown is enabled in the Utility Settings. |
Things to keep in mind
Shark Tank Tab
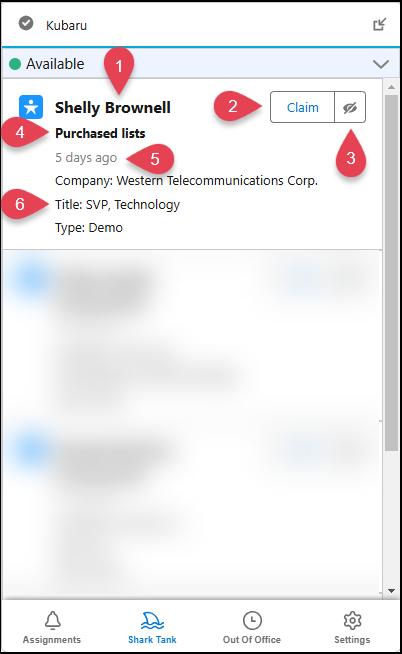
The Shark Tank tab lets users view records that are available to claim. Users will only see records that belong to shark tanks if they’re members. The following details will be displayed for shark tank records:
| # | ITEM | DESCRIPTION |
|---|---|---|
| 1 | Title | The name associated with the record. Clicking on this field will open the record. You can change the Title Field in the Utility Settings. |
| 2 | Claim Button | Users can click Claim to assign a record to themselves. |
| 3 | Hide Button | Users can click the Hide icon to remove a record from the list. Users will be able to unhide records by clicking the Unhide All Records link at the bottom of the list. The Hide icon will only display when Users Can Hide Records is enabled in the Utility Settings. |
| 4 | Shark Tank Name | This is the name of the shark tank router the record belongs to. You can hide this field by disabling Show Shark Tank Name in the Utility Settings. |
| 5 | Timer | This indicates how long the record has been in the shark tank. |
| 6 | Details | You can select up to three fields to display in the Utility Settings. |
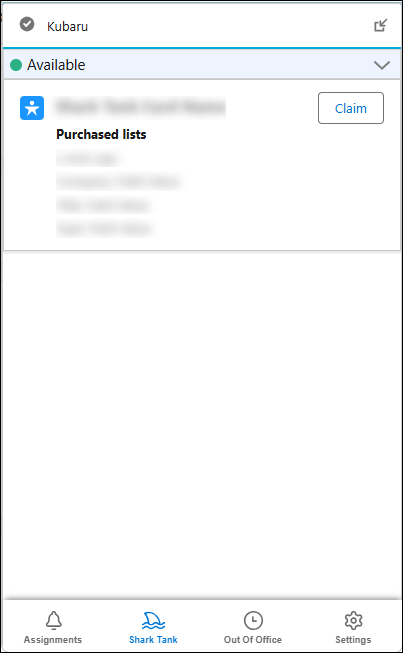
Blind Tank
Enabling the Blind Tank setting in a shark tank router will obscure record details until they are claimed. This is useful if you want to prevent users from cherry-picking records.
Things to keep in mind
Out Of Office Tab
You can enable the Manage Out Of Office Schedules feature in the Utility Settings to let users manage their own out of office schedules. Users will not receive assignments while out of office (unless the Assign When Out Of Office setting is enabled in your routers).
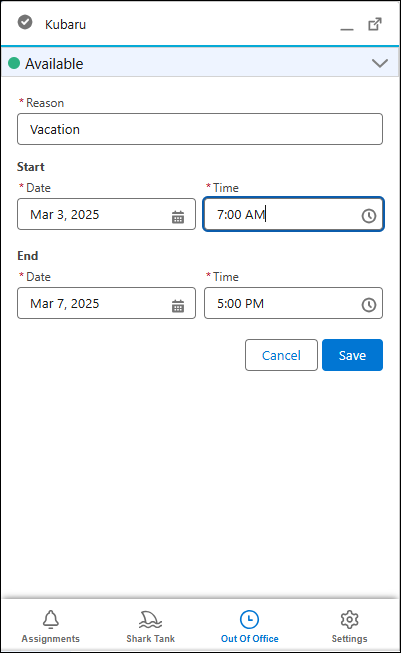
Follow these steps to create a new out of office schedule:
- Open the Out Of Office tab in the Kubaru Utility.
- Click Add New.
- Enter a Reason (e.g., “Vacation”).
- Enter a Start Date and Start Time.
- Enter an End Date and End Time.
- Click Save.
Users will also be able to edit and delete existing schedules from the Kubaru Utility.
Things to keep in mind
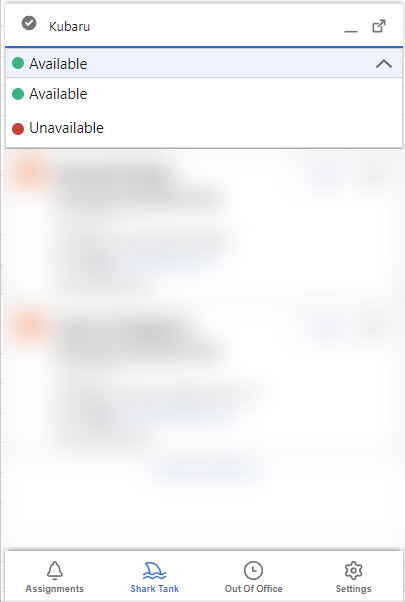
User Status
You can enable the Manage Status feature in the Utility Settings to let users to toggle their status between Available and Unavailable. Users will not receive assignments while set to Unavailable (unless the Assign When Unavailable setting is enabled in your routers).
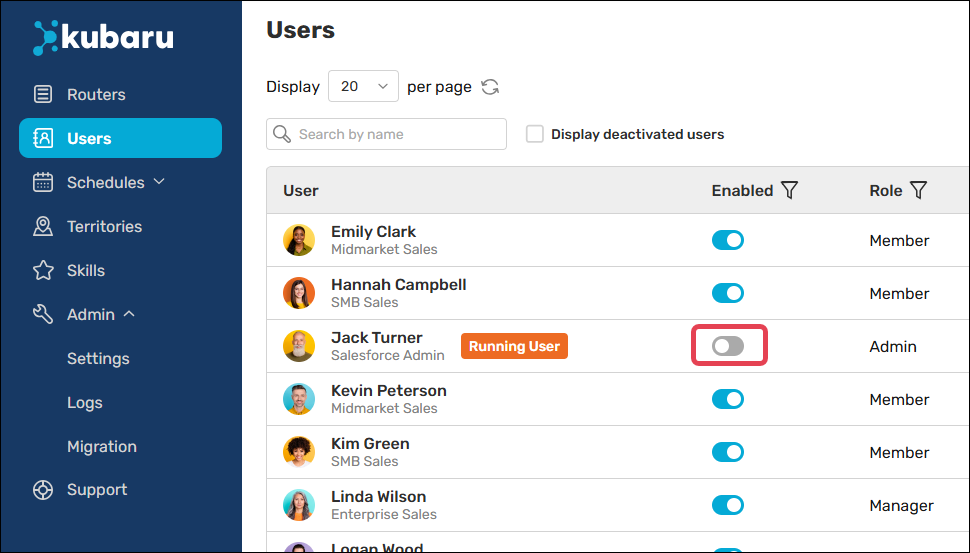
This toggle is directly linked to the Enabled toggle on the Users page. When a user sets themselves as Unavailable, the Enabled toggle will be disabled, and vice versa.
Settings Tab
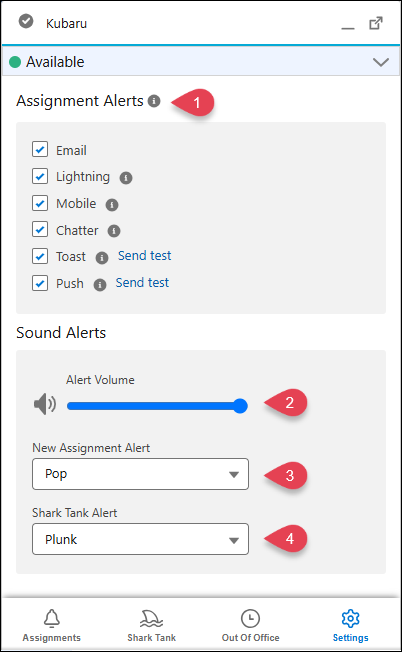
Users can configure the following notification settings from the Settings tab:
| # | SETTING | DESCRIPTION |
|---|---|---|
| 1 | Assignment Alerts | Users can enable/disable assignment notifications (e.g., Email, Lightning, Mobile, Toast, etc.). See Assignment Notifications for information about each of these notification types. Users will only be able to modify assignment alerts if “Enabled, users can override” is selected in the Notification Settings, otherwise these settings will be read only. |
| 2 | Alert Volume | Users can control the volume level for sound alerts. |
| 3 | New Assignment Alert | Users can select which sound plays when they receive a new assignment. |
| 4 | Shark Tank Alert | Users can select which sound plays when a new shark tank record becomes available to claim. |
Things to keep in mind