The Reimbursement feature assigns users additional records to compensate them for records that were either rejected or reassigned.
Defining Rejected Records
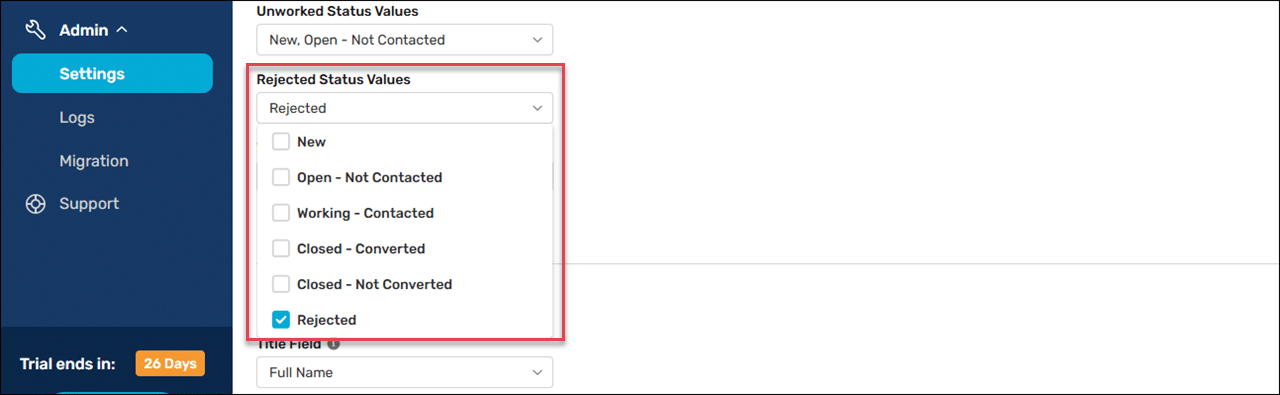
Before you can reimburse rejected records, you must define what a rejected record is in Workload Settings.
- Expand the Admin tab in the navigation menu and click Settings.
- Click the Object Settings tab.
- Select an Object.
- Check all status values corresponding to a rejected status in the Rejected Status Values field.
- Click the Save button.
Enable Reimbursement
Only assignments made after enabling this feature will be impacted.
Follow these steps to enable reimbursement for one or more routers:
- Create a new router or edit an existing one.
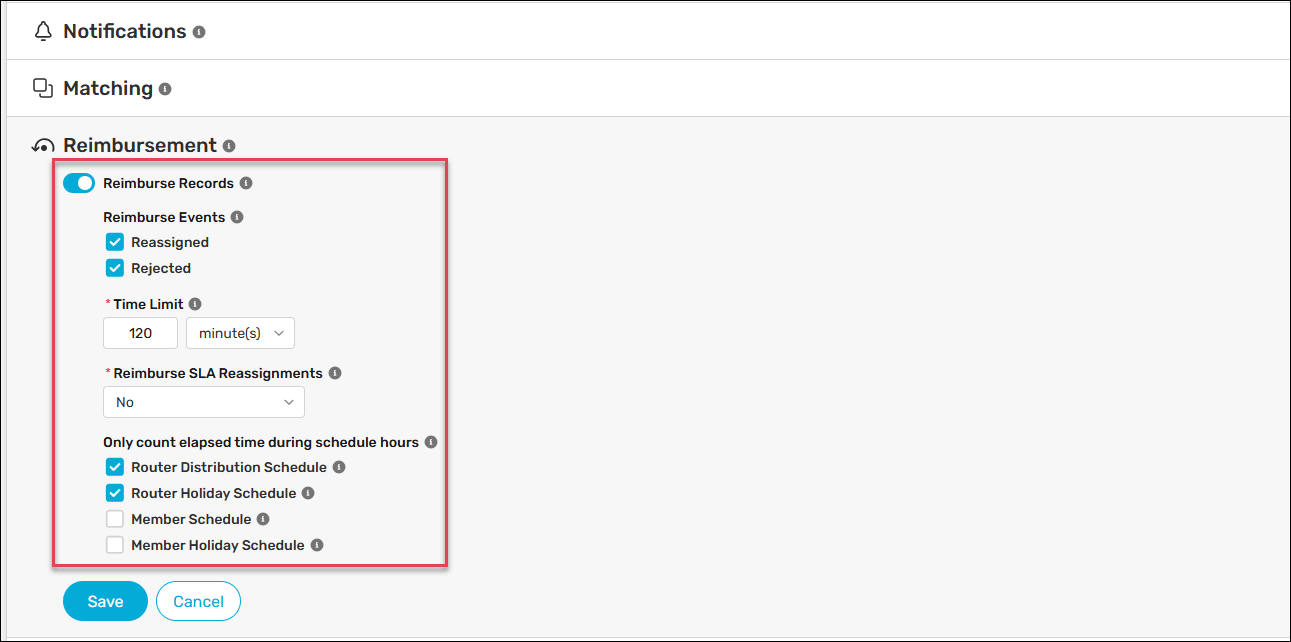
- Scroll to Additional Settings and click Reimbursement.
- Click the Reimburse Records toggle.
- Select whether records should be reimbursed when Reassigned and/or Rejected.
- Enter a Time Limit for how long records are eligible for reimbursement. For instance, setting the time limit to 30 minutes means users will only be reimbursed for records they reassign or reject within 30 minutes of being assigned.
- If Reassigned is checked, you can specify whether automatic reassignments qualify for reimbursement using Reimburse SLA Reassignments. We do not recommend enabling this, as it can lead to a reimbursement loop if a recipient is consistently not working their records.
- (Optional) Select one or more schedules from the Only count down during schedule hours section. See Context Schedules for more information.
- Click the Save button.
Monitoring Reimbursements
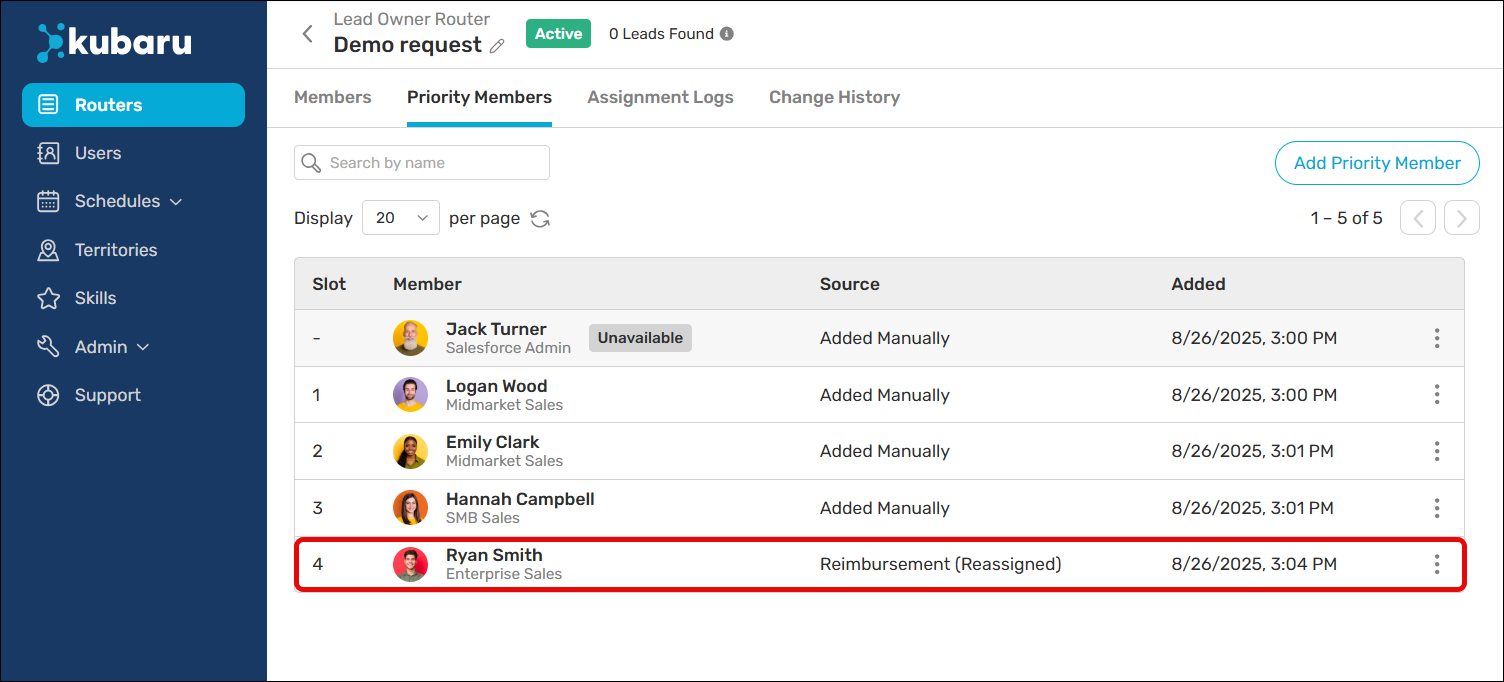
Users who qualify for reimbursements will be added as Priority Members in the router Priority Members tab. The Source column will state either “Reimbursement (Rejected)” or “Reimbursement (Reassigned)” to indicate why the user was added as a priority member.
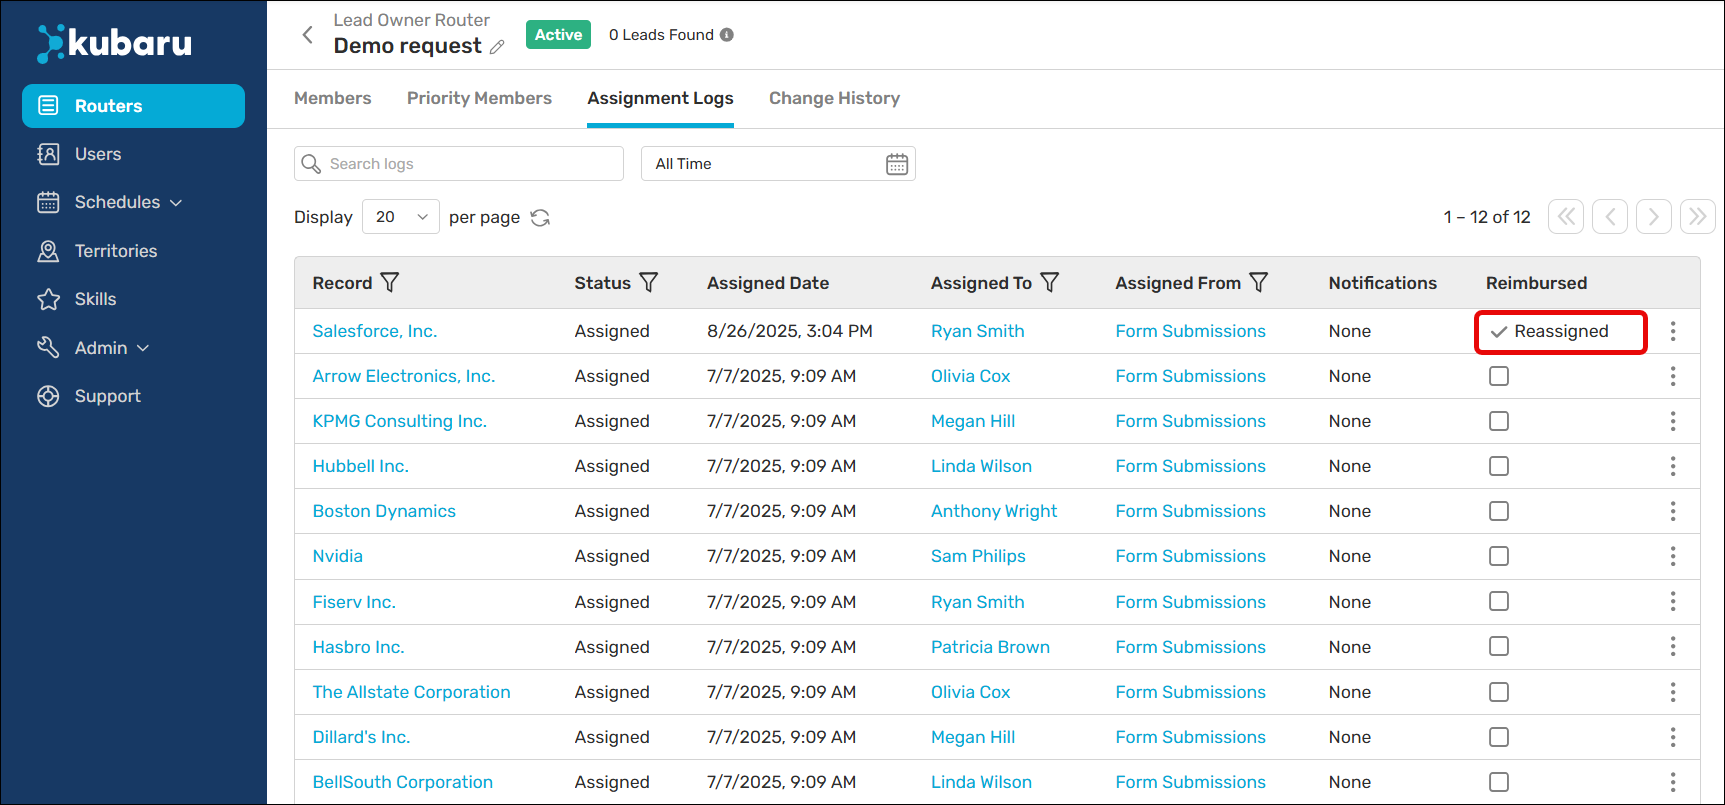
Once the reimbursement is made, the Assignment Logs will indicate the reason for the reimbursement.