
Quick Summary
A Salesforce ticketing system routes support requests to the right people fast enough that nothing falls through. This guide walks through how to configure case management in Salesforce, where the standard tools start to break down, and how to automate assignment so your system scales without constant admin intervention.
Why Salesforce Ticketing Systems Matter
Support tickets pile up fast. When assignment depends on someone manually sorting through a queue or waiting for IT to update routing rules, response times slip and customers notice. A proper ticketing system distributes cases based on skills, capacity, and availability so every ticket lands with someone who can actually handle it.
Salesforce Cases give you the foundation, but the default assignment tools weren’t built for complex routing. As your support team grows and your product evolves, you need automation that keeps pace without requiring developer time for every adjustment.
This guide shows you how to build a system that scales with Kubaru.
Why Listen to Us
Over 100 companies across SaaS, fintech, and healthcare use Kubaru to automate case assignment. Being native to Salesforce, we see where standard tools break down and what works when ticketing systems need to scale.

What Is a Salesforce Ticketing System?
A Salesforce ticketing system uses Cases to track customer issues from creation through resolution. Each case captures the problem, priority, status, and assignment so your team knows what needs attention and who’s responsible.
The basic components are:
- Cases: Individual support requests with fields like Subject, Description, Priority, Status, and Case Owner
- Case Assignment Rules: Automation that routes new cases to users or queues based on criteria
- Queues: Holding areas for unassigned cases that multiple team members can access
- Email-to-Case: Automatic case creation from customer emails
- Web-to-Case: Case creation from web forms on your site
- Case Teams: Groups of users who collaborate on complex cases
Standard Salesforce gives you these pieces, but connecting them into a system that actually scales requires more planning than most teams expect.
Setting Up Basic Case Management in Salesforce
Before you automate assignment, configure the core case structure so your team has the information they need to work efficiently.
Step 1: Configure Case Fields
Standard case fields cover the basics, but most teams need custom fields to route effectively.
Navigate to Setup > Object Manager > Case > Fields & Relationships. Review which standard fields your team will use:
- Case Origin: How the case was created (Email, Phone, Web, Chat)
- Priority: Urgency level (High, Medium, Low)
- Status: Current state (New, Working, Escalated, Closed)
- Type: Category of issue (Question, Problem, Feature Request)
- Case Reason: More specific classification
Add custom fields that help route cases correctly:
- Product Line: Which product the case relates to
- Issue Category: Technical, Billing, Account Management, etc.
- Customer Tier: Enterprise, Professional, Basic
- Region: Geographic territory for assignment
- Skill Required: Specific expertise needed
Click New to create each custom field. Choose the appropriate field type (picklist for predefined options, text for free-form entry), set the field label and values, configure field-level security, and add to relevant page layouts.
The fields you create here become the criteria you’ll use to route cases later.
Step 2: Set Up Case Queues
Queues hold cases until they’re assigned to specific users. They let multiple team members see and claim cases rather than forcing everything through one assignment bottleneck.
Go to Setup, search for Queues, and click New. Name your queue descriptively based on how you’ll use it:
- Support Queue – General
- Support Queue – Technical Issues
- Support Queue – Billing
- Support Queue – Enterprise Customers
- Support Queue – Escalations
Select Case as the supported object. Add queue members by clicking Add and selecting users, roles, or public groups. These members can view and accept cases from the queue.
Save the queue. Repeat for each routing category you need.
Step 3: Create Case Assignment Rules
Case assignment rules automatically route new cases to users or queues based on criteria you define. Salesforce includes this natively, but it’s limited.
Navigate to Setup, search for Case Assignment Rules, and click New. Name your rule set and check Active to make it the default for new cases.
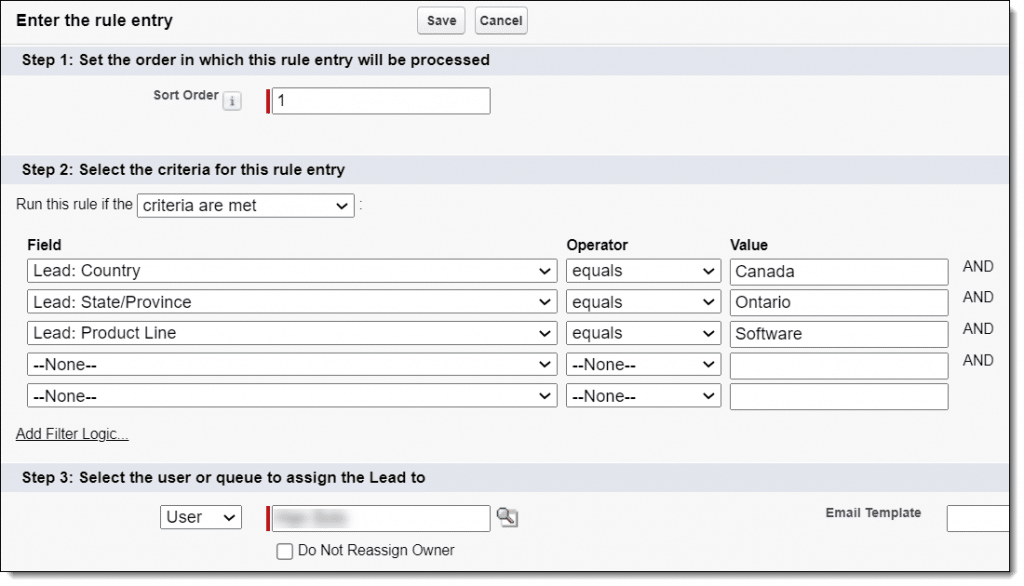
Click New in the Rule Entries section to add routing logic:
- Set Sort Order to control evaluation sequence (lower numbers run first)
- Define Criteria using case fields (e.g., Priority equals High, Product Line equals Platform)
- Choose User or Queue to assign to
- Optionally select an Email Template to notify the assignee
Each rule entry routes cases that match specific criteria. The first matching rule assigns the case, so order matters. In addition, there are some critical limitations to think about and plan for:
- Maximum 3,000 assignment rules across your entire org, which complex routing exhausts quickly
- Only supports Leads and Cases, not other objects like Accounts or custom objects
- No round robin distribution, weighted assignment, or workload balancing
- Business users can’t update rules without system admin privileges
- No schedule awareness or time-based routing
- Limited visibility into why a case was assigned where it was
For simple scenarios with a small team, native rules work. For anything more complex, you need specialized tools (which we’ll cover below).
Step 4: Enable Email-to-Case
Email-to-Case automatically creates cases from customer emails sent to specific addresses.
Go to Setup, search for Email-to-Case, and click Edit. Check Enable Email-to-Case and configure:
- Routing Addresses: Email addresses that create cases (support@yourcompany.com)
- Route to Queue or User: Where emails from each address should go
- Save Email Headers: Useful for troubleshooting
- Notify Case Owner: Alert assignee about new cases
Choose between On-Demand Email-to-Case (uses Salesforce servers) or Email-to-Case Agent (routes through your email server for more control).
Save your settings. Cases will now generate automatically from incoming emails.
Step 5: Enable Web-to-Case
Web-to-Case creates cases from forms on your website or customer portal.
Navigate to Setup, search for Web-to-Case, and click Edit. Check Enable Web-to-Case and configure:
- Default Case Origin: Set to “Web”
- Default Response Template: Auto-reply to acknowledge submission
Click Generate HTML to get form code. Customize field mappings to match your case structure, then embed the form on your site. When customers submit the form, Salesforce creates a case automatically.
Where Standard Salesforce Ticketing Breaks Down
Most teams start with native case management and hit the same scaling issues:
- Manual Assignment Overhead: When routing logic gets complex, someone spends hours each week manually assigning cases that should route automatically.
- Slow Rule Updates: Business users wait weeks for system admins to update assignment logic when territories change, team members join or leave, or new products launch.
- Assignment Rule Limit: The 3,000 rule cap sounds high until you need routing that considers product line, region, skill, priority, customer tier, and availability. Complex logic exhausts the limit fast.
- No Workload Balancing: Native assignment doesn’t consider how many open cases each person has. High performers get overloaded while others work below capacity.
- Queue Bottlenecks: Cases sit in queues waiting for someone to manually claim them instead of routing directly to available team members.
- Missing Round Robin: Without even distribution, some reps get flooded while others have light loads.
- No Schedule Awareness: Cases assign outside business hours and sit unworked instead of routing to available coverage.
- Limited Visibility: When assignment fails or goes wrong, tracking down why takes digging through debug logs.
These issues don’t break small teams, but they become critical as volume grows.
Building a Scalable Ticketing System with Automated Assignment
Automated assignment solves the scaling problems by routing cases based on skills, workload, availability, and schedules without requiring constant admin updates.
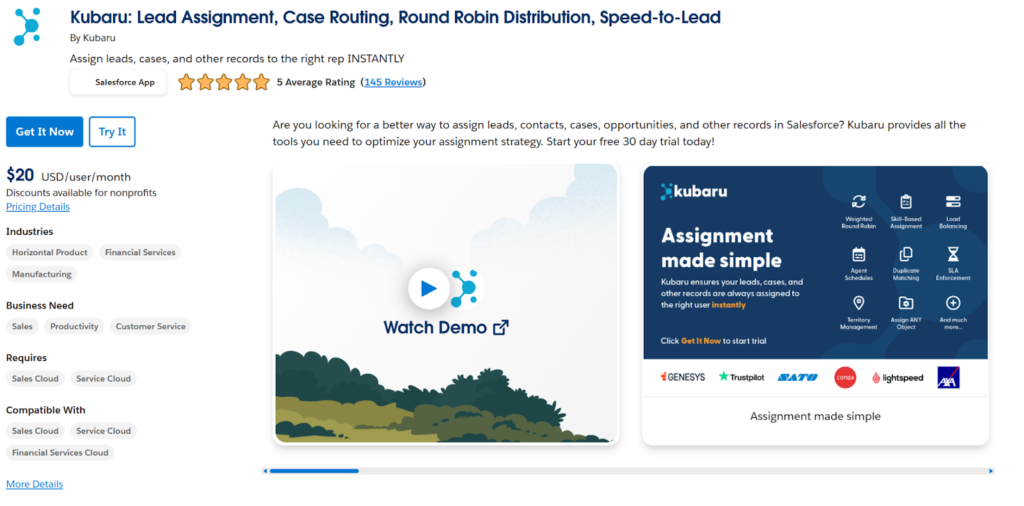
Why Kubaru for Case Assignment
Kubaru is a native Salesforce app built specifically for automated assignment. It eliminates the limitations of standard assignment rules and gives business users direct control over routing logic.
Key advantages:
- Business User Administration: Sales ops and support managers update routing without system admin privileges
- Unlimited Assignment Rules: No 3,000 rule cap to worry about
- Round Robin Distribution: Even workload distribution with optional weighting for capacity differences
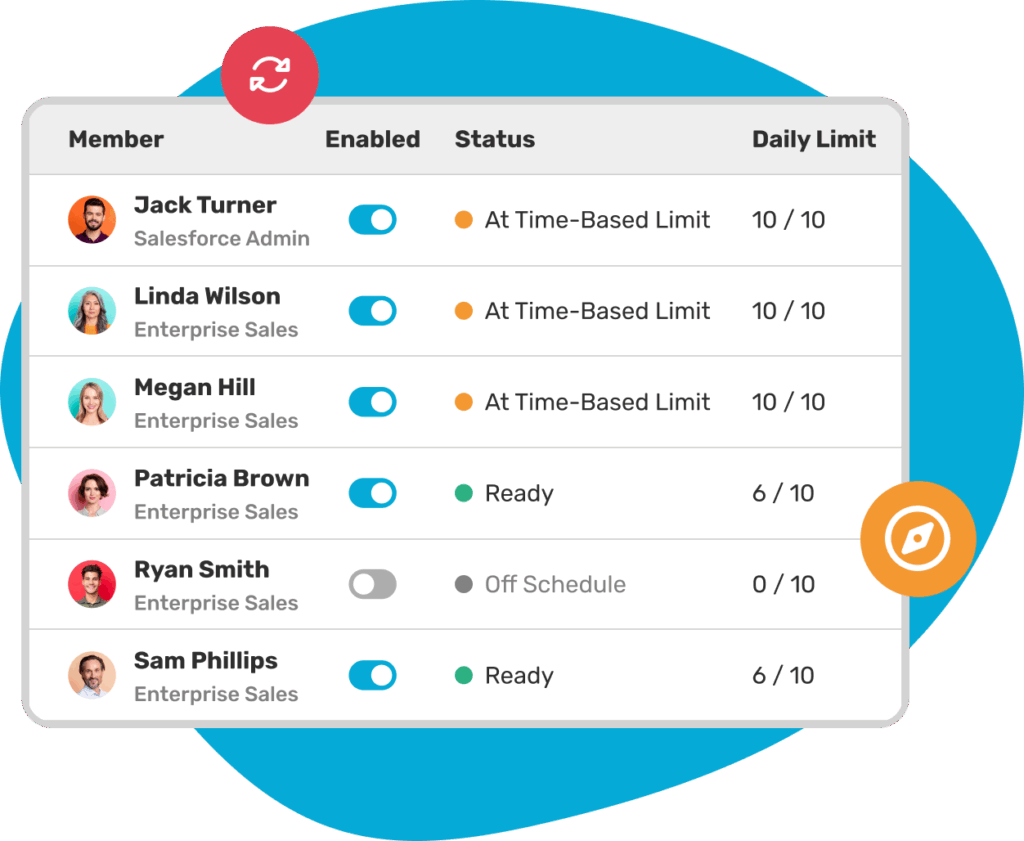
- Workload Balancing: Route based on open case count so no one gets overloaded
- Schedule-Based Routing: Assign only during business hours or route to follow-the-sun coverage
- Universal Object Support: Works with Cases, Leads, Accounts, Opportunities, and custom objects
- Detailed Assignment Logs: Complete visibility into routing decisions
Kubaru costs less than half what broader revenue operations platforms charge while delivering deeper assignment functionality.
Step 1: Install Kubaru
Visit the Kubaru AppExchange listing and click Get It Now.
Choose whether to install in production or sandbox, log in to your Salesforce org, and confirm installation for admins only or all users.
Step 2: Create a Case Router
Open the Kubaru app from your app launcher and click New Router. Enter a descriptive name like “Support Case Router”, select Case as the object, and choose Owner as the field to assign.
Set the Evaluation Order if you have multiple routers (lower numbers evaluate first).
Click Create Router, then select your Assignment Method:
- Round Robin: Even distribution across team members
- Load Balance: Routes to whoever has the fewest open cases
- Territory: Assigns based on geographic or account territory
- Rule-Based: Uses conditional logic to route to different users or groups
- Skill-Based: Matches cases to users based on expertise (with round robin or load balance as a tie breaker)
- User Lookup: Assigns based on a related record’s owner (e.g., route cases to the account owner)
- Shark Tank: Notifies team members and lets them claim cases
- Duplicate Matching: Routes duplicates to the same owner
For most support teams, Round Robin, Load Balance, or Skill-Based are the most common starting points.
Step 3: Connect Your Queues
Routers pull cases from existing Salesforce queues, so connect the queues you created earlier.

In the What to Assign section, click the Connect Queue(s) picklist and select your support queues. Cases landing in these queues will route automatically based on your router configuration.
If your object doesn’t support queues, use the Connect User(s) option to specify users directly.
Save to finish queue setup.
Step 4: Add Distribution Filters
Filters control which cases from your connected queues get assigned. Skip them to assign everything, or add criteria to route selectively.
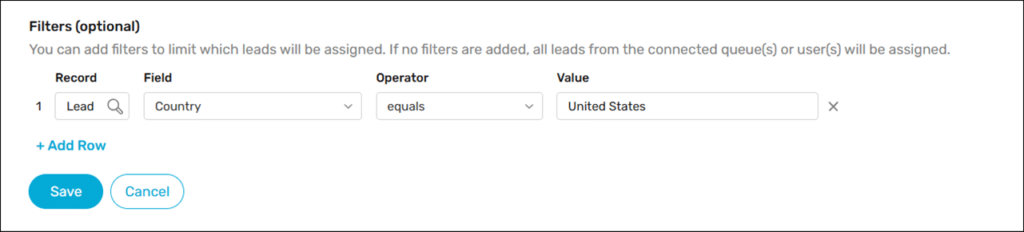
Click Add Row under Filters (optional). Choose a Field like Priority, an Operator like equals, and a Value like High.
Add multiple rows to layer conditions:
- Priority equals High
- Product Line equals Enterprise Platform
- Region equals North America
Set Filter Logic to control how conditions combine:
- AND: Case must match all conditions
- OR: Case must match at least one condition
- Custom: Combine conditions like 1 AND (2 OR 3)
Click Save to apply filters.
Step 5: Add Router Members
Router members are the users who receive assigned cases. Add them manually or use Member Sync to automate based on criteria.
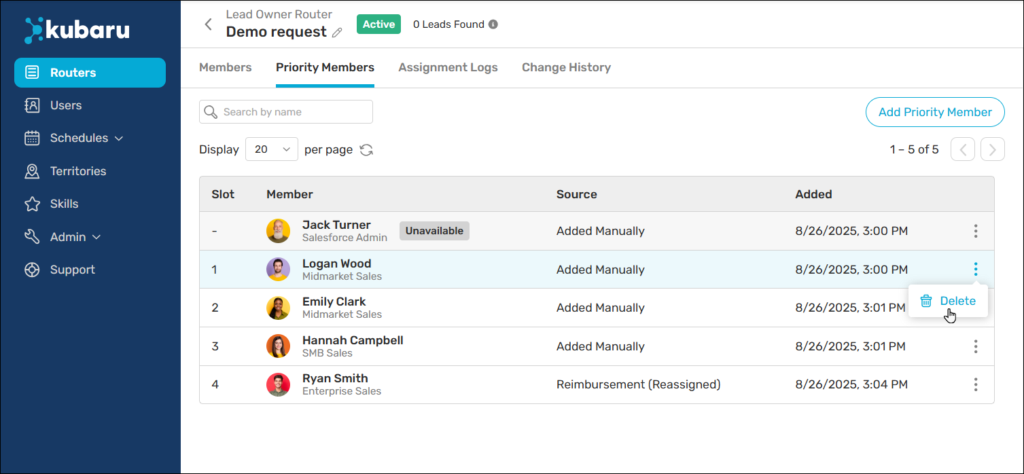
In the Router Members section, click Select Members and choose users from the list. Click Save to add them.
For automatic management, enable Member Sync. Select a User Field like Role, choose an Operator, and enter a Value that identifies team members. The router will automatically add users who match and remove users who don’t.
This keeps your routing current as team composition changes without manual updates.
Step 6: Configure Round Robin with Weighting
If some team members have more capacity than others, adjust their weights to match.
In the Router Members table, find the Weight column. The default is 1. Change it to 2 to give that member twice as many assignments, or 0.5 to give them half.
With three members (A, B, C) and equal weights, the pattern is A-B-C-A-B-C. If A has weight 2, the pattern becomes A-B-A-C, giving A twice the volume.
Weights let you match distribution to actual capacity instead of assuming everyone handles the same load.
Click Save to apply weights.
Step 7: Set Up Workload Balancing
Load balancing routes cases to whoever has the fewest open cases instead of strict rotation. This prevents overload and keeps distribution even when case resolution times vary.
In Assignment Method, select Load Balancing or combine it with round robin. Configure which case statuses count as “open” so resolved cases don’t factor into workload calculations.
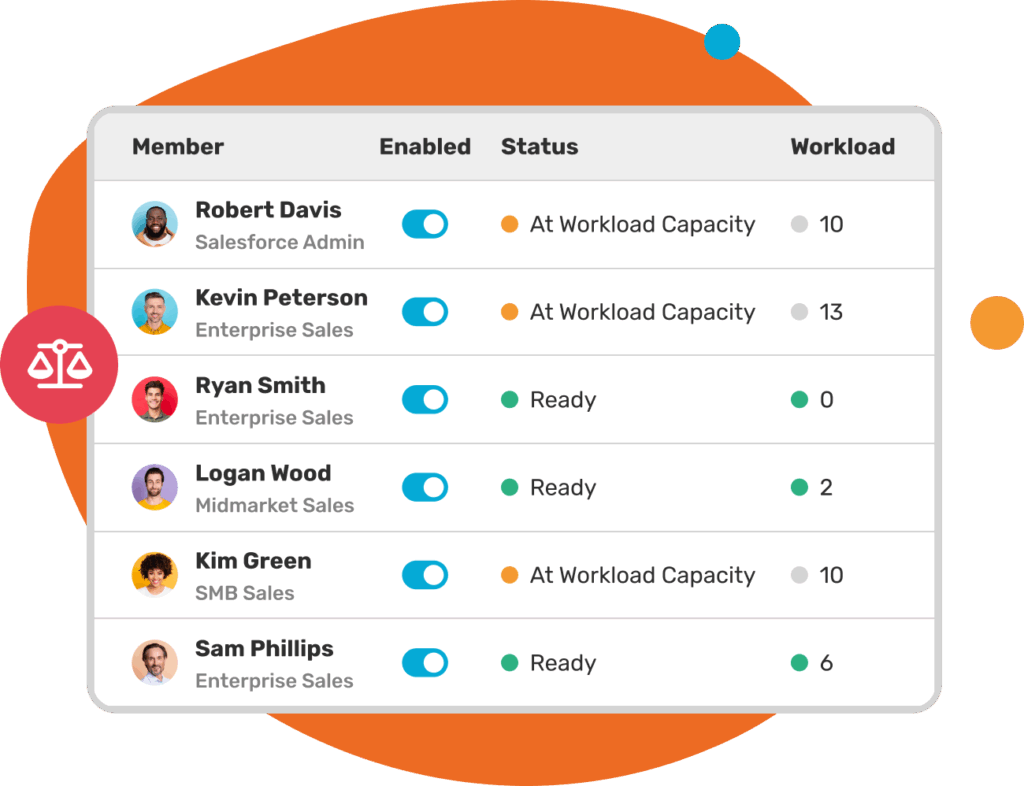
Kubaru checks open case counts in real-time and routes to the least busy member. This works especially well for teams where case complexity varies significantly.
Step 8: Create Distribution Schedules
Distribution schedules control when assignments happen. Use them to route only during business hours or match time zones for global teams.
- Go to the Schedules tab, select Distribution, and click New Schedule. Name it, choose a time zone, select active days, and set business hours.
- Save the schedule, then return to your router. In Additional Settings, click Scheduling and Availability and select your schedule.
- Check Assign During Off-Hours if cases that arrive outside business hours should still count toward SLAs without actually assigning until the next business day.
- You can also assign schedules to individual members in the Router Members section for teams spread across multiple time zones.
Click Save to apply scheduling.
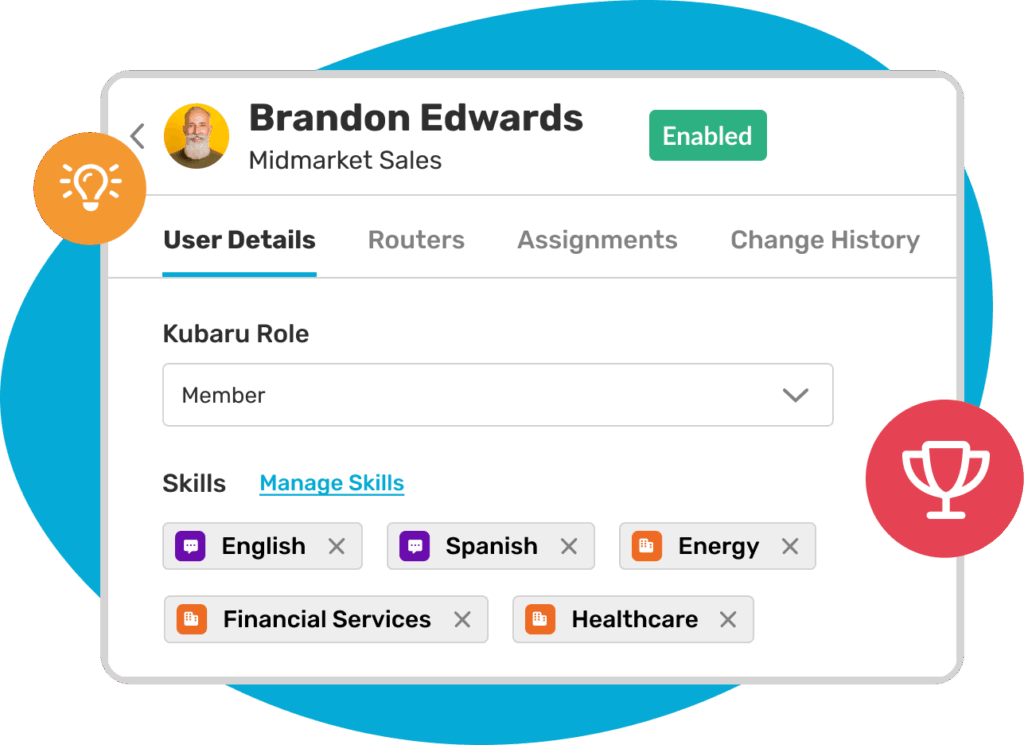
Step 9: Configure Skills-Based Routing
Skills-based routing matches cases to users with specific expertise. This means technical issues go to technical reps and billing questions go to billing specialists.
Kubaru has a dedicated Skills Management system. Navigate to the Skills tab and click New Skill to create skills like “Technical Support,” “Billing,” “Enterprise Account,” or “Product Specialist.” Then assign those skills to the appropriate users.
When creating a skill-based router:
- Select Skill-Based Assignment as your Assignment Method
- Click Select Skill to choose which skills the router should match against
- Mark skills as Required if cases should only route to users with that skill, or leave them optional with a Wait Time before Kubaru disregards the skill
- Choose a Tie Breaker (Round Robin or Load Balance) to distribute evenly among qualified members
Kubaru evaluates each case against the selected skills and routes to available users who match. If no skilled users are available and the skill isn’t required, Kubaru can fall back to any available router member after the wait time expires.
Step 10: Set Up Reassignment for Unworked Cases
Cases that sit unworked hurt response times and customer satisfaction. Automatic reassignment moves stale cases before they become problems.
Kubaru supports SLA-based reassignment that monitors cases after assignment and takes action when they remain unworked past your threshold. Before using this feature, configure your Workload Settings to specify what qualifies as an “unworked” record. Current capabilities include notifying users and reassigning cases after a specified number of minutes.
Upcoming SLA features will expand this significantly with multiple SLA types (initial response vs. resolution), staged actions (notify at 5 minutes, escalate at 10 minutes, reassign at 15 minutes), advanced actions like field updates and temporarily pausing assignments to users who violate SLAs, visual SLA tracking on case records, and enhanced SLA reporting and metrics.
To configure reassignment, scroll to Additional Settings in your router and click SLA Actions. Toggle Reassign Record on, then:
- Specify the time interval to wait before reassigning an unworked case
- Select the user or queue to which cases should be reassigned
- Optionally select schedules to control when the countdown occurs
Click Save. Kubaru will monitor assigned cases and reassign automatically when the threshold is exceeded.
Step 11: Configure Overflow Behavior
Overflow handling determines what happens when no router members are available to receive assignments.
In Additional Settings, select your Overflow Behavior:
- Continue Evaluation: Pass the case to the next router in sequence
- Stop Evaluation: Hold the case in the queue until someone becomes available
- Assign To User/Queue: Route to a specific user or escalation queue immediately
When overflow occurs, Kubaru logs “(Overflow)” in the assignment record so you know why routing took that path.
Click Save to apply overflow rules.
Monitoring and Optimizing Your Ticketing System
After your automated assignment goes live, monitor performance to identify optimization opportunities.
Track Key Metrics
Measure these metrics to understand system health:
- Average Response Time: How quickly team members engage after assignment
- Assignment Volume by Member: Whether distribution stays balanced
- Reassignment Rate: How often cases move due to SLA violations
- Queue Time: How long cases wait before assignment
- Overflow Frequency: How often no members are available
Kubaru’s assignment logs provide the data you need for each metric.
Adjust Weights and Filters
If metrics show imbalanced distribution, adjust member weights to match actual capacity. If wrong cases route to your team, refine filters to be more selective.
Business users can make these adjustments directly without admin involvement, so optimization happens faster.
Review Member Availability
Check whether schedules accurately reflect when team members work. Time zone changes, shift adjustments, and PTO all affect availability and should update in your router configuration.
Optimize Reassignment Thresholds
If cases reassign too quickly, increase your threshold. If they sit unworked too long, decrease it. The right threshold varies by case type and team capacity.
As Kubaru’s expanded SLA features roll out, you’ll gain more granular control with multiple thresholds and staged actions.
Building a Ticketing System That Scales
The system you’ve built here handles the mechanics. But the real test comes when your team doubles, your product adds three new tiers, or your biggest customer demands dedicated support.
That’s where most ticketing systems fall apart. Someone has to rebuild the routing logic from scratch, wait two weeks for IT to make changes, or hire another admin just to keep assignment rules current.
With Kubaru, your support ops team handles it directly. New product line? Add a skill and a filter. New territory? Update the router in five minutes. No tickets to IT, no waiting.
Schedule a demo and we’ll show you how it works.